Sending Adobe Analytics Clickstream Data To AWS S3
Adobe Analytics' clickstream data is the raw hit data that adobe tracks on your website. Used properly, it’s a powerful source of data as it tells you exactly what someone did when they visited your site - what they clicked on, what their IP address is, the exact time of every hit, etc. A consequence of the granularity of the data is that this dataset is big, especially if your site gets a lot of traffic. In order to acquire this mass of data, you have to use Adobe’s Data Feeds.
I recently had a client ask me to develop a data pipeline that sent his Adobe clickstream data to Google BigQuery. Unfortunately, Adobe doesn’t provide this out of the box (nor does it provide a connector to Google Cloud Storage), but it does have a nice connector to AWS S3. So, I ended up building a pipeline that went from Adobe to S3 to Google BigQuery. In this tutorial, I’ll cover my steps on the fist part of that pipeline; going from Adobe to S3.
Step 1 - Setting up the S3 Bucket
First of all, if you don’t have an AWS account, get one.
Next you’ll need to set up an S3 bucket. This is synonymous with a “directory” or “folder” in a typical file system. To set this up, log in to the AWS console, then search for and click on S3. Then click create bucket. Give the bucket a unique name like “adobe-feedz-123”. The remaining settings should be correct.

Now that your bucket is created, you can open it and see any files contained inside it (of course, it should be empty at this point). You can manually upload and download files to the bucket, which is especially useful for testing.
Step 2 - Setting up a dedicated “adobe” user on AWS with S3 permissions
Next we’ll create a new user named “adobe” and give it access to read and write data to S3. We’ll need this user’s credentials when setting up the automated feed from Adobe.
- Navigate to the IAM service from the AWS console.
- Click on users > add user
- Give the user a name and check the box labelled “Programmatic access”
- Select “Attach Existing Policies Directly”. Search for and select AmazonS3FullAccess
- Complete the process of creating the user (leaving the remaining default options in place)
- Download the user credentials. Store them in a safe place. In particular, make note of the Access Key and Secret Access Key.
Step 3 - Setting up the Adobe Analytics Feed
Now we’ll set up an hourly recurring data feed. We opt for an hourly feed versus daily feed to make transferring the files more manageable (they’re big files).
- In Adobe Analytics, navigate to the Data Feed Manager (Analytics > Admin > Data Feeds)
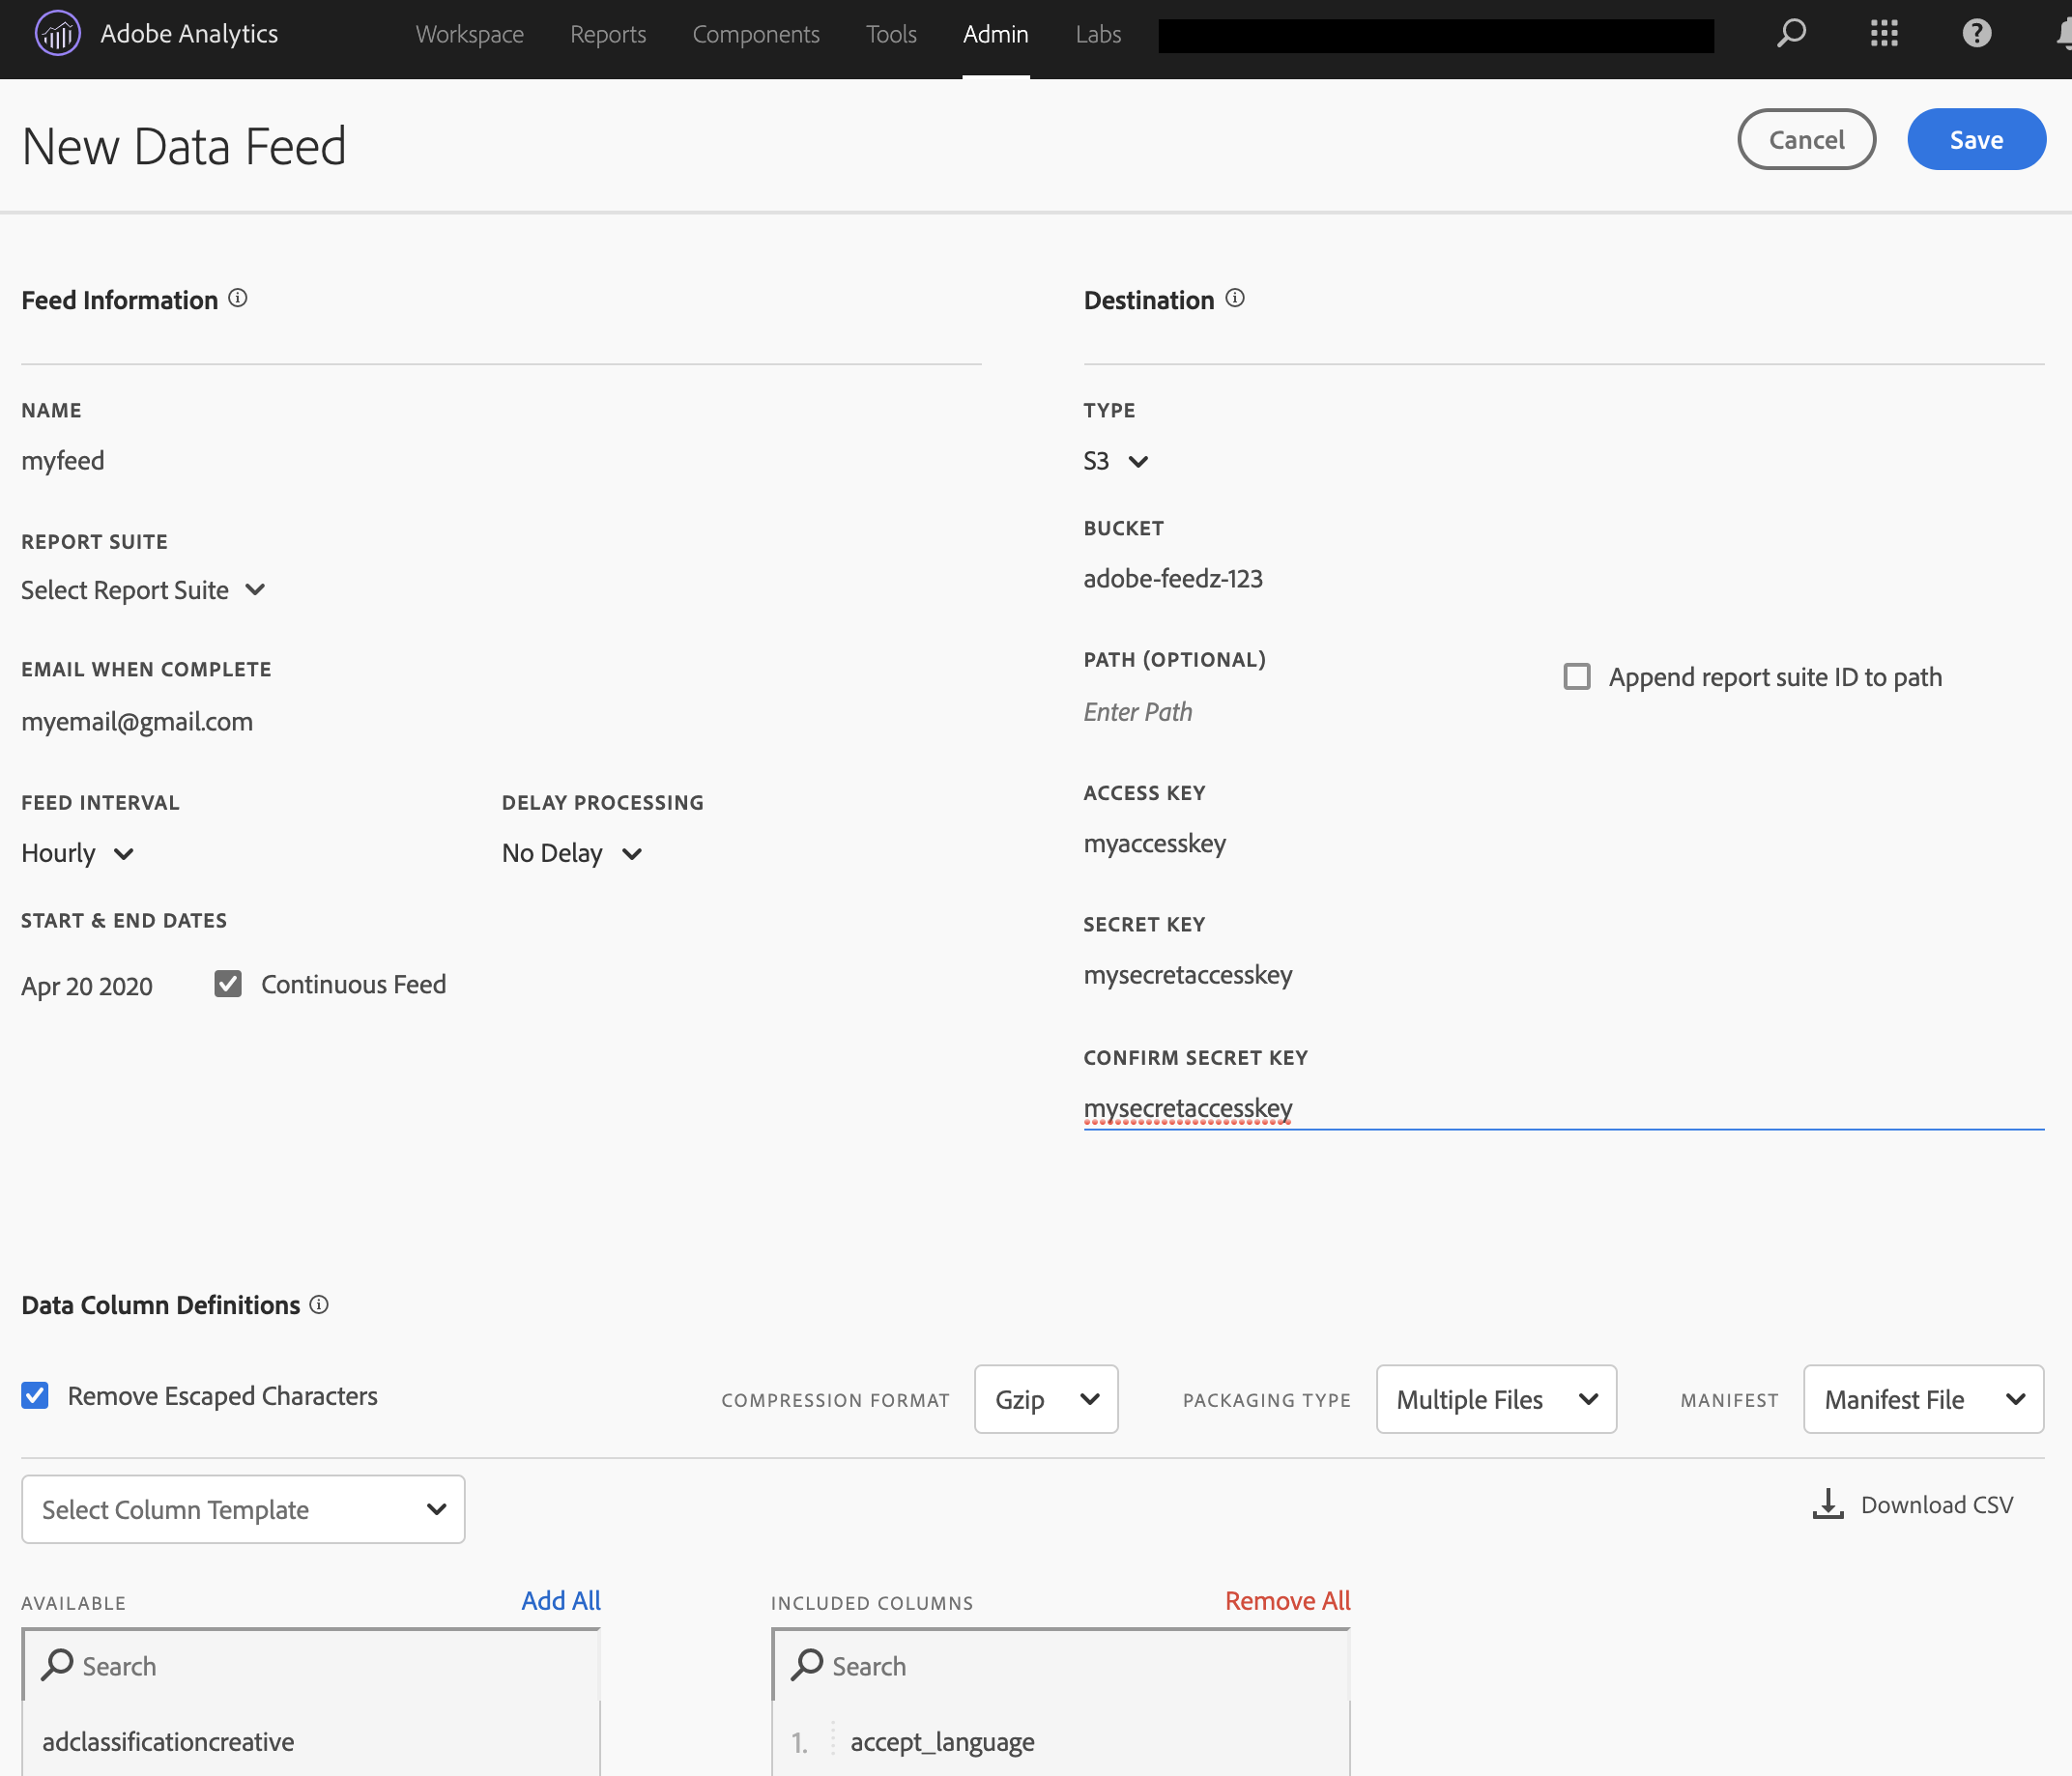
- Fill out the form. Note the following
- You have to provide an email address for notifications. This is annoying because you’ll get an email every hour. However, within your email manager (e.g. gmail) you should be able to direct the emails to a specific folder so they don’t clog your inbox.
- You can choose to run a historical feed (in which case you’d choose start and end dates) or a continuous feed (in which case you’d just choose a start date).
- Set Type equal to S3.
- BUCKET should be the name of your S3 bucket (e.g. adobe-feedz-123)
- ACCESS KEY and SECRET KEY are the credentials associated with your adobe user created in Step 2. If you lost your credentials, you cannot recover them, but you can create new credentials for the same user.
- Check the box that says Remove Escaped Characters
- Leave the file format defaults in place (COMPRESSION FORMAT = Gzip | PACKAGING TYPE = Multiple Files | MANIFEST = Manifest File)
- Add some columns to the feed

- Save the feed. It may take up to ~20 minutes to transfer the first hour of data to S3. You can monitor the feed’s progress in the jobs tab of the feed manager.

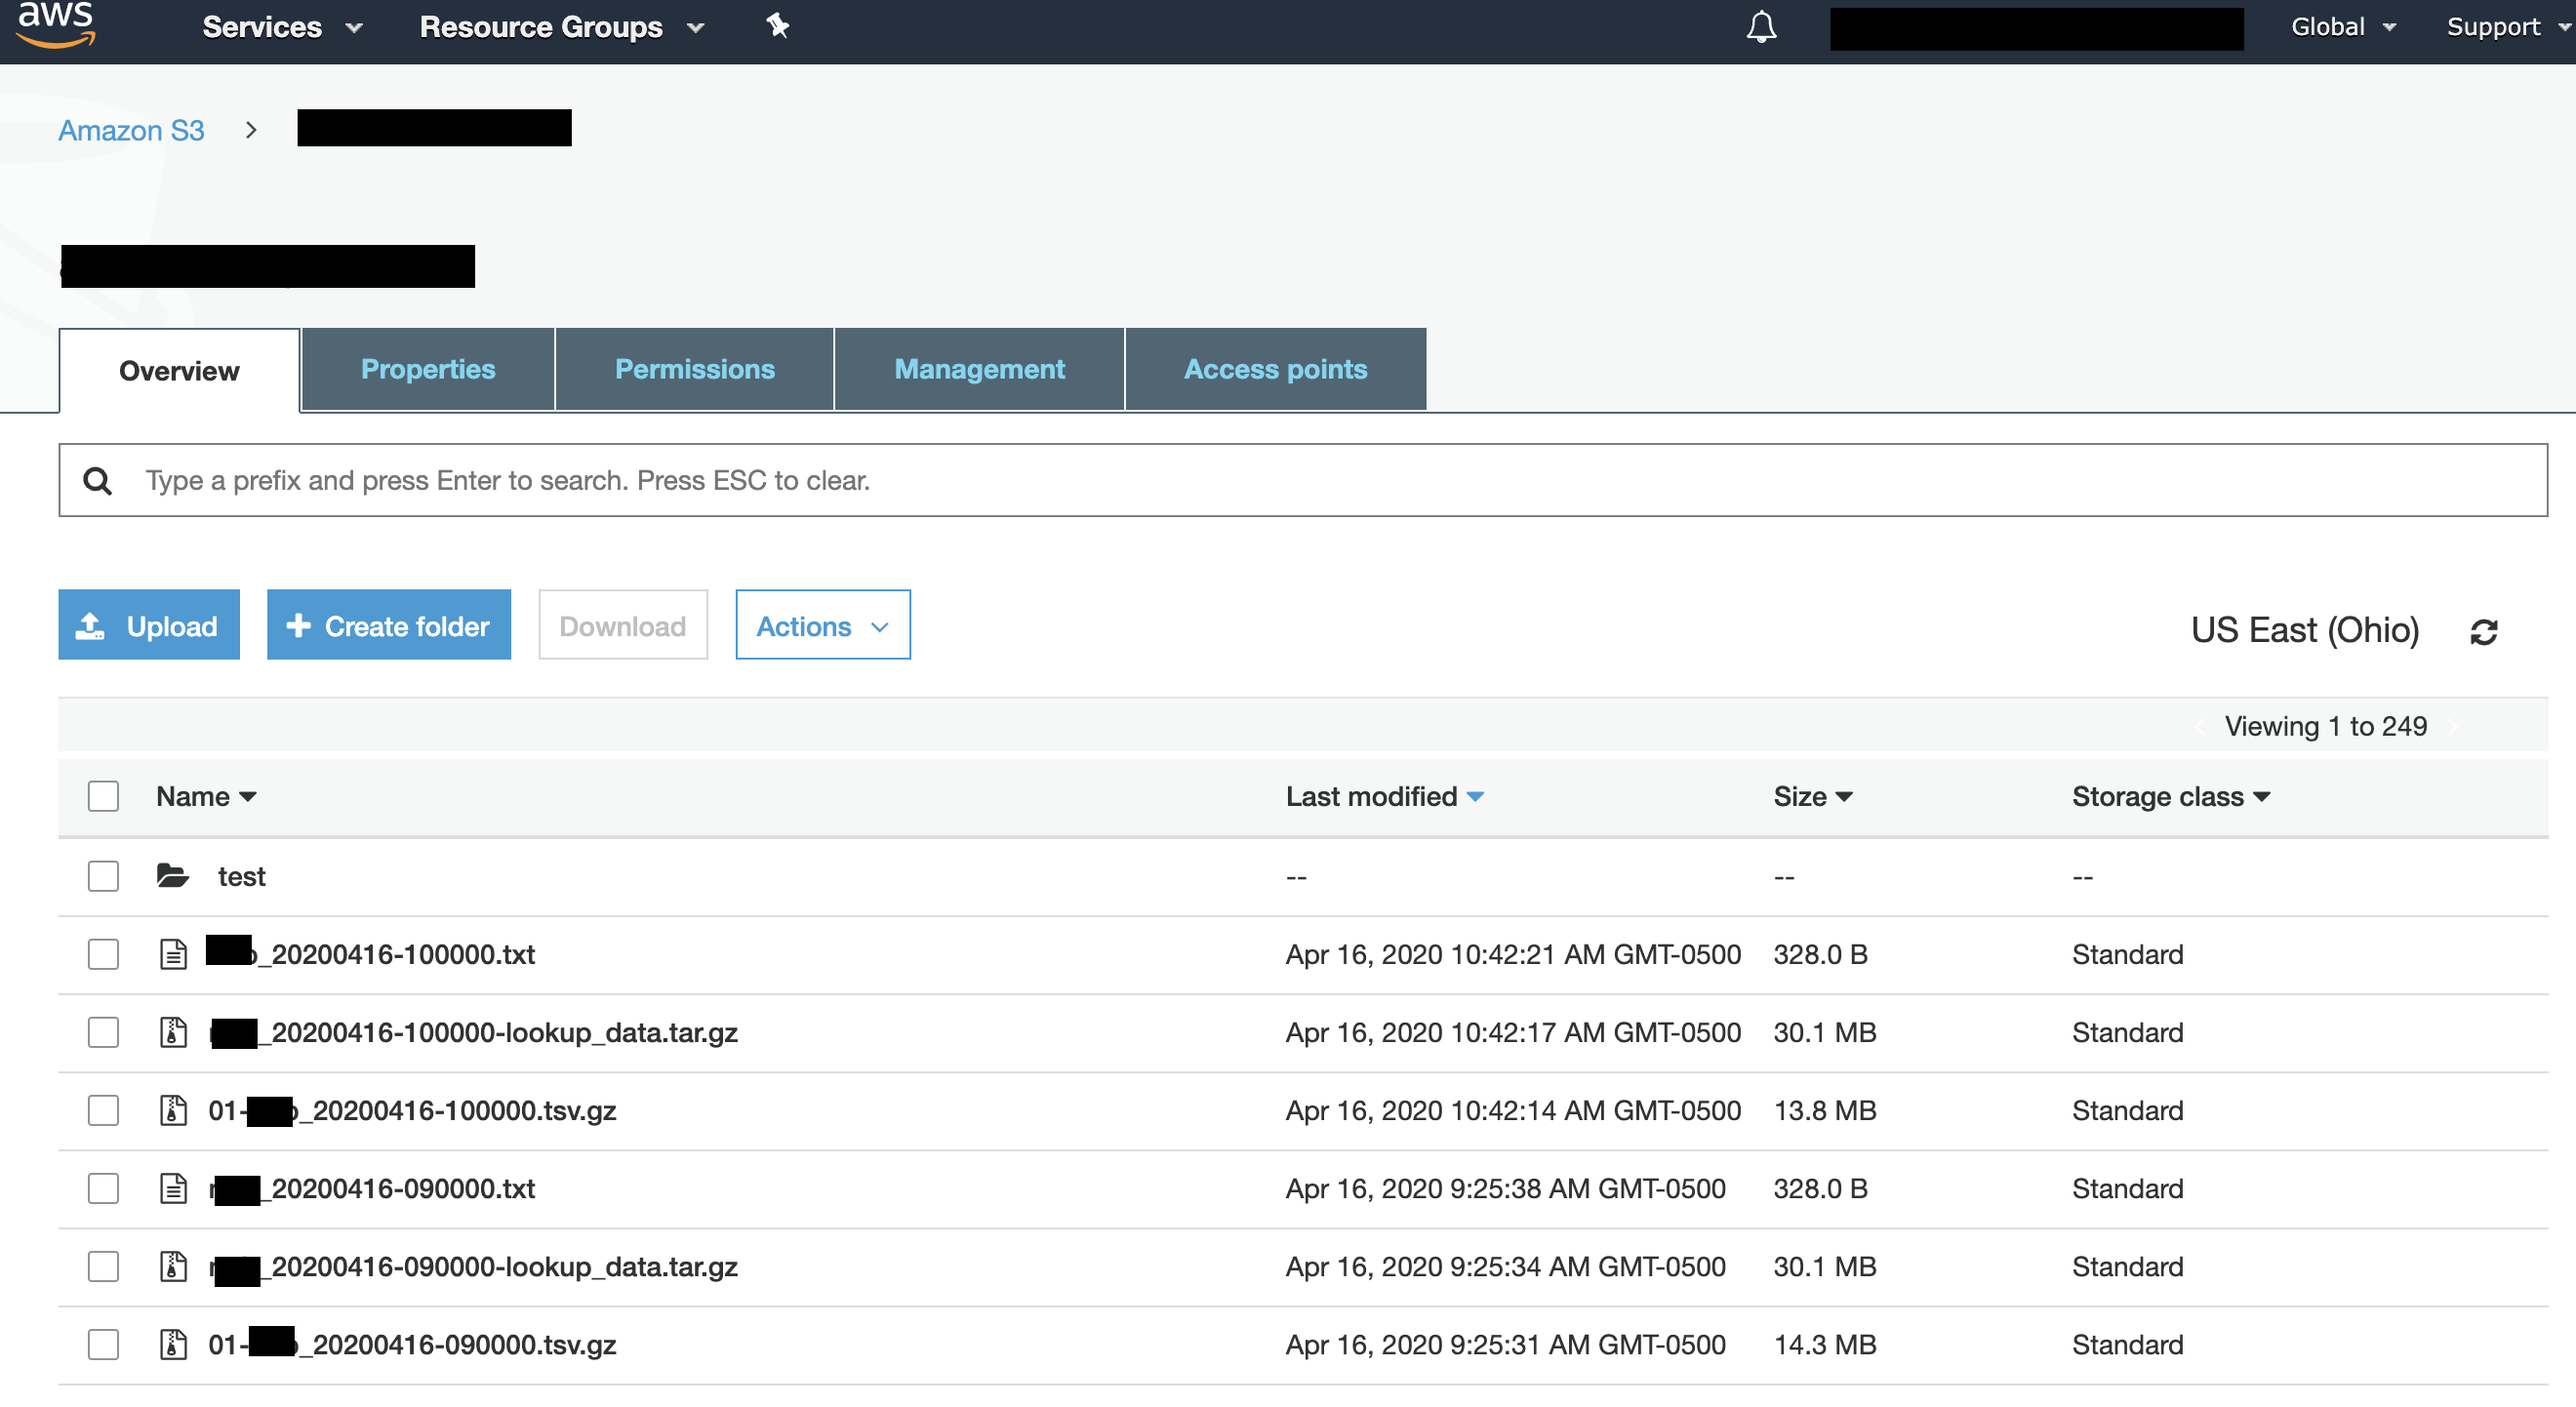
You S3 bucket should eventually populate with files like this.

Each hour generates three files.
- xyz_20200420-130000.txt is a checksum file that gives some meta data about the big data file. You can use this to make sure the transfer worked properly, and no rows of data got lost in the process. The checksum file looks like this
Datafeed-Manifest-Version: 1.0
Lookup-Files: 1
Data-Files: 1
Total-Records: 504835

Lookup-File: xyz_20200420-130000-lookup_data.tar.gz
MD5-Digest: 3ae5bc1f73c53eeaeeaebf99d4122f1b
File-Size: 31617386

Data-File: 01-xyz_20200420-130000.tsv.gz
MD5-Digest: 180f0935289396b7fec4f837efa00baf
File-Size: 9872991
Record-Count: 504835
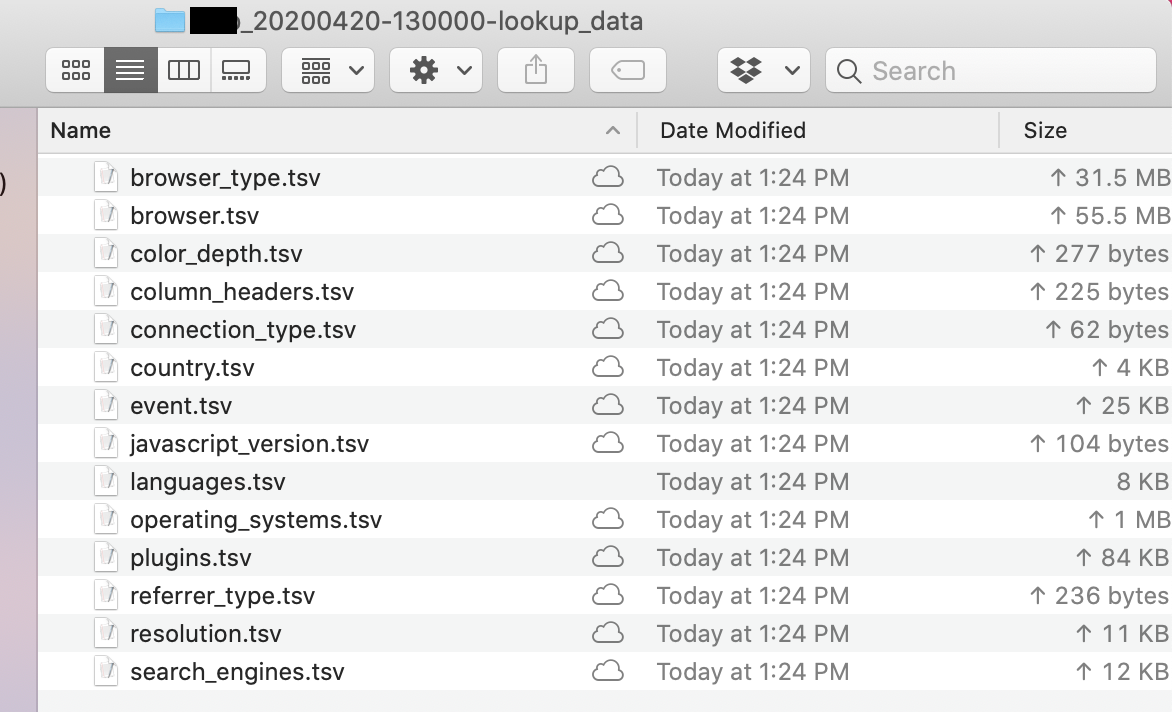
- xyz_20200420-130000-lookup_data.tar.gz is a compressed folder of TSV files. One of those TSVs defines the headers of the actual data file and the rest are lookup tables. (E.g. browser.tsv gives the descriptive browser name for each unique browser id).

- 01-xyz_20200420-130000.tsv.gz is a compressed TSV file of the actual clickstream data. Note that it doesn’t have a header row.
 GormAnalysis