Beginner's Guide To Google BigQuery
In this tutorial, we’ll cover everything you need to set up and use Google BigQuery. If you know R and/or Python, there’s some bonus content for you, but no programming is necessary to follow this guide.
Specifically, we’ll cover
- Setting up a Google Cloud Project
- Setting up a BigQuery dataset and table
- Transferring data from Google Cloud Storage to BigQuery
- Transferring data from AWS S3 to BigQuery
- Querying your data
- Gotchas, Tips, and Best Practices
- BigQuery for R and Python users
Before we get into the details…
Why use BigQuery?
BigQuery let’s you store and query big data, fast. Like, petabytes of data.
How does it work?
- You make some tables of data.
- You run some SQL queries against that data.
- BigQuery parallelizes your queries across a bunch of workers (if it can) and spits back a result.
What does the architecture/framework look like?
There are a few components which we’ll cover in more detail below, but the framework is essentially this

1. Setting Up A Google Cloud Project
If you haven’t done so already, sign up for google cloud platform. Then create a new project. I’ll call mine alligaroo.
Pro Tip: If your name your project something boring and generic like “bigquery-test”, google will append a random number to your project name to create its unique ID (e.g. “bigquery-test-26401”). If you give your project a unique name, google won’t do this.
Once your project is created, make sure it’s selected as the active project. Note the project name, ID, and number.

2. Setting Up A BigQuery Dataset And Table
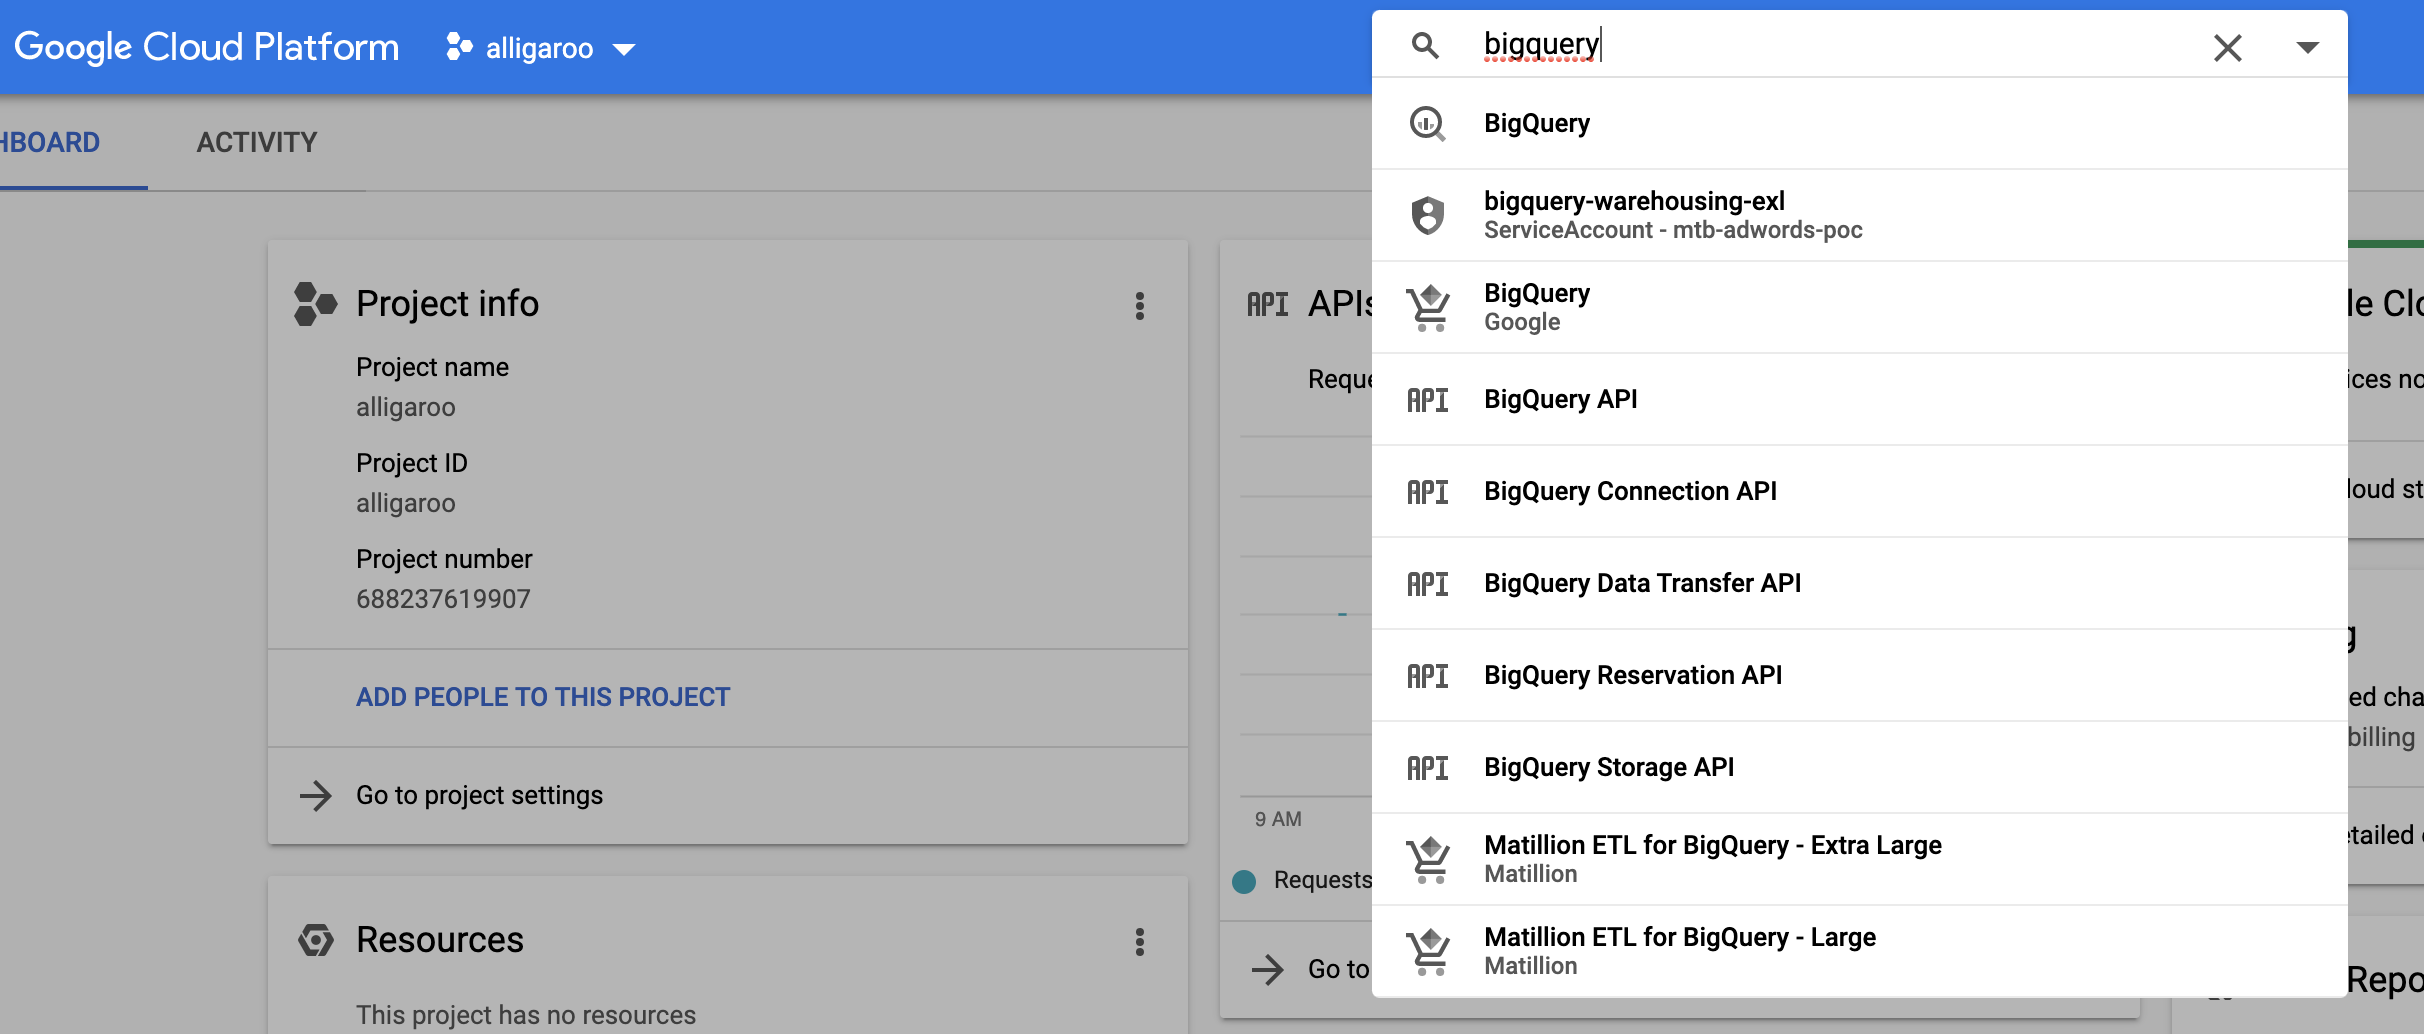
Start by searching and selecting BigQuery in the search bar.
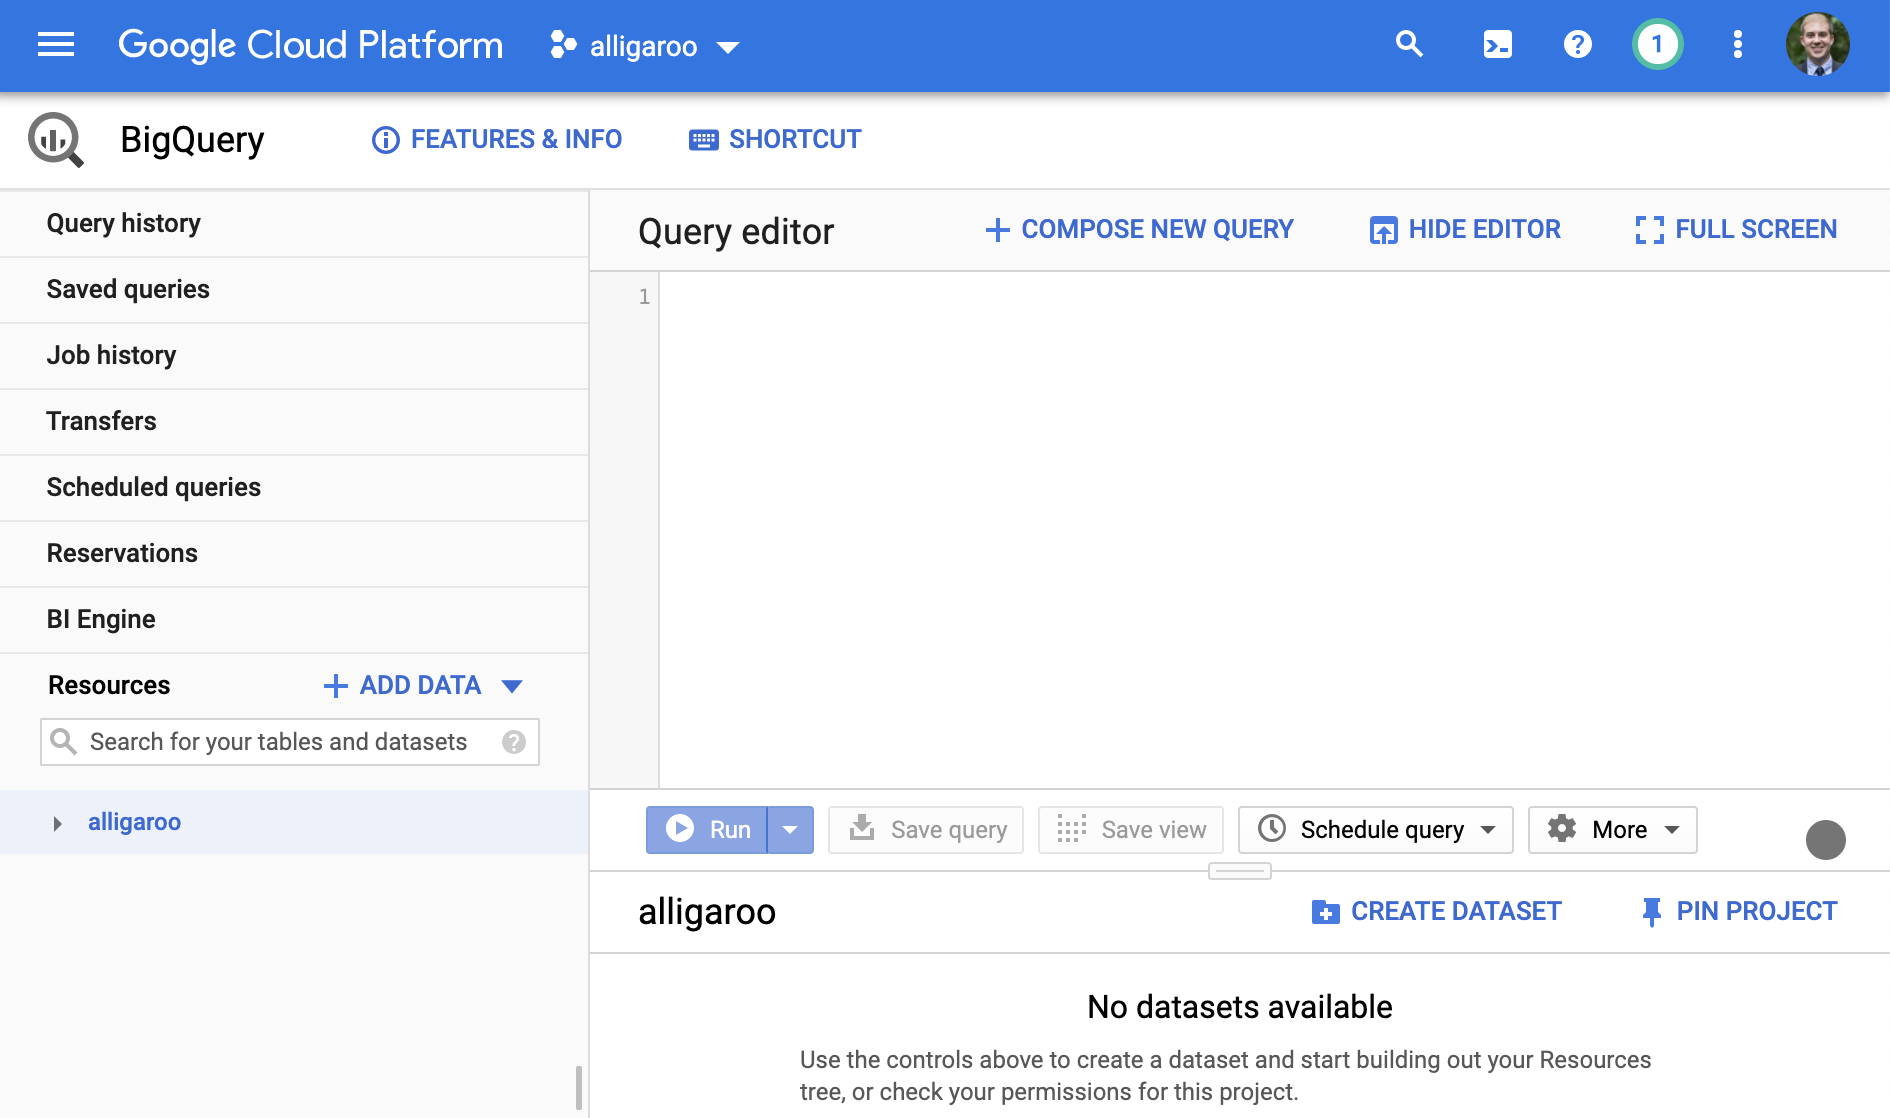
At this point you should be presented with the BigQuery Web UI. We’ll be spending a lot of time here.
The first thing to wrap your head around is the concept of datasets and tables. Tables live within datasets. The purpose of a dataset is just to organize a collection of related tables. For example, you might have datasets and tables like
- google_ads_dataset
- campaigns_tbl
- audiences_tbl
- clicks_tbl
- bing_ads_dataset
- campaigns_tbl
- audiences_tbl
- clicks_tbl
- facebook_ads_dataset
- campaigns_tbl
- audiences_tbl
- clicks_tbl
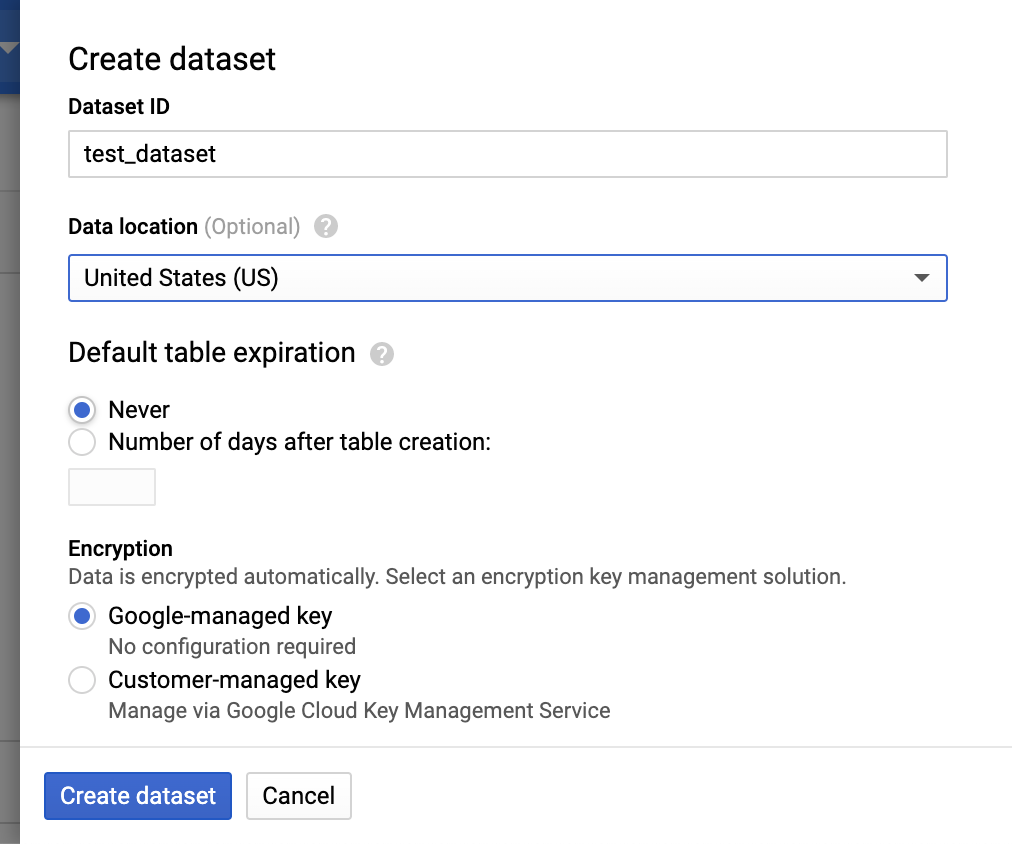
Let’s make a dataset called test_dataset. Click the CREATE DATASET button and the fill out the form. Pick a location near you. If you’re in the US, you might prefer to pick “US” as opposed to a specific US location like “us-east-1”. I’ll do that.
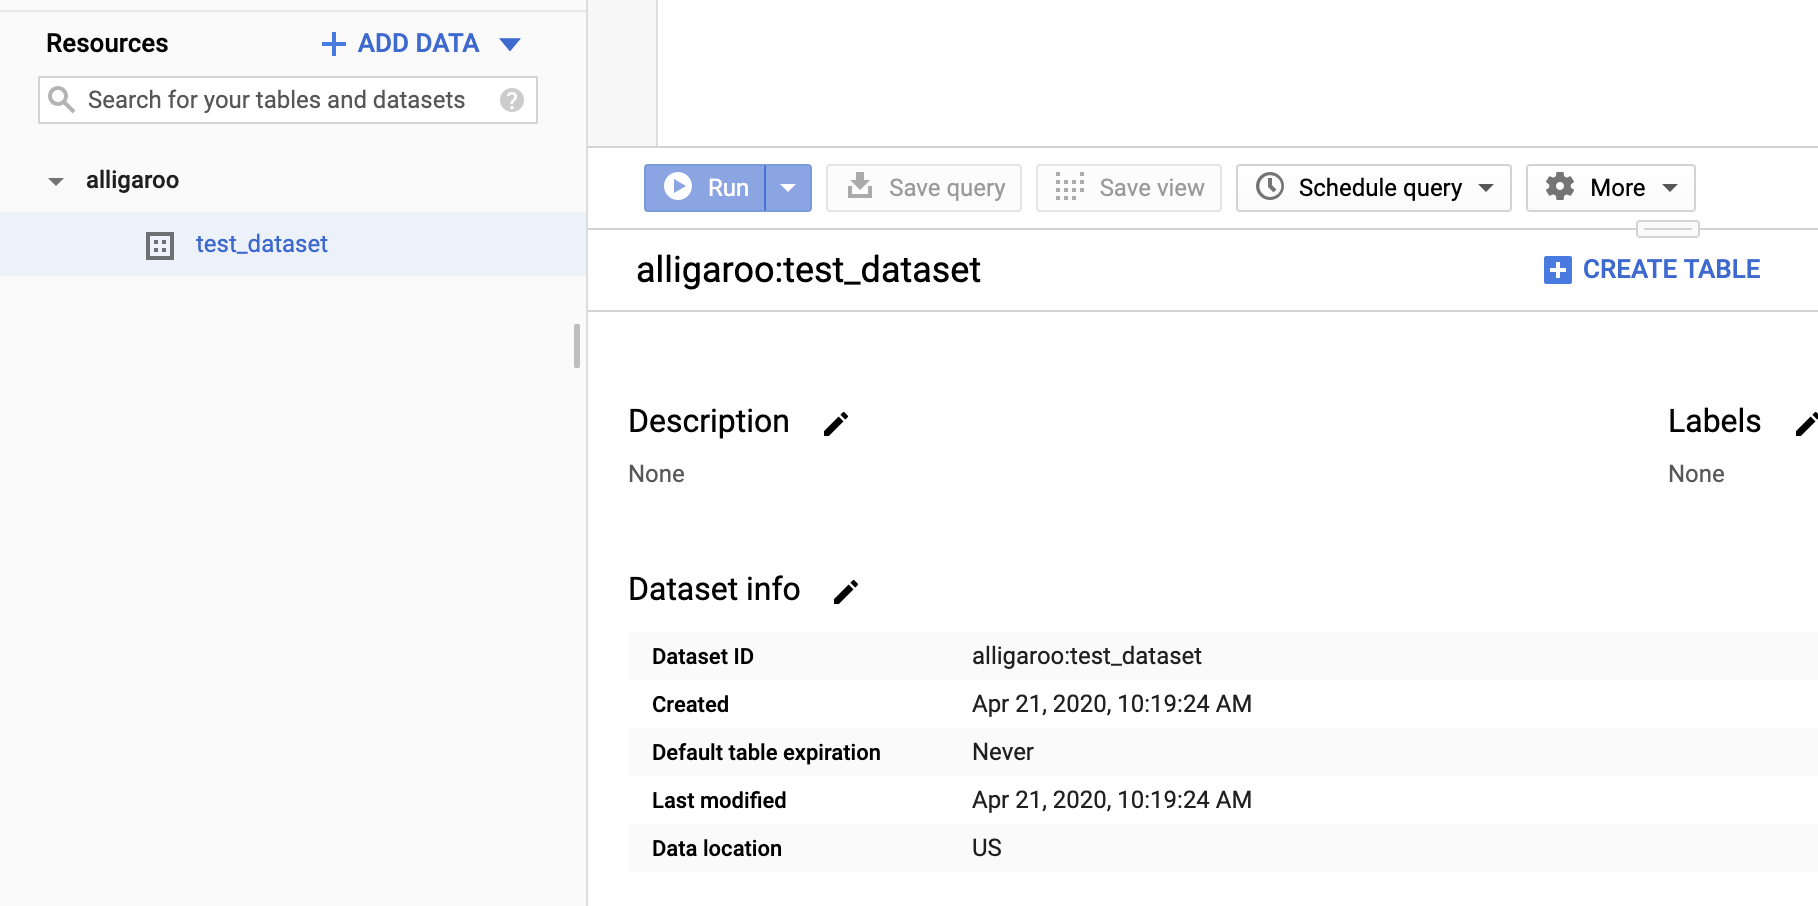
Now the dataset should appear under your project name in the sidebar. Click it to select the dataset and view its details.
Now let’s make a table called transactions from this CSV file.

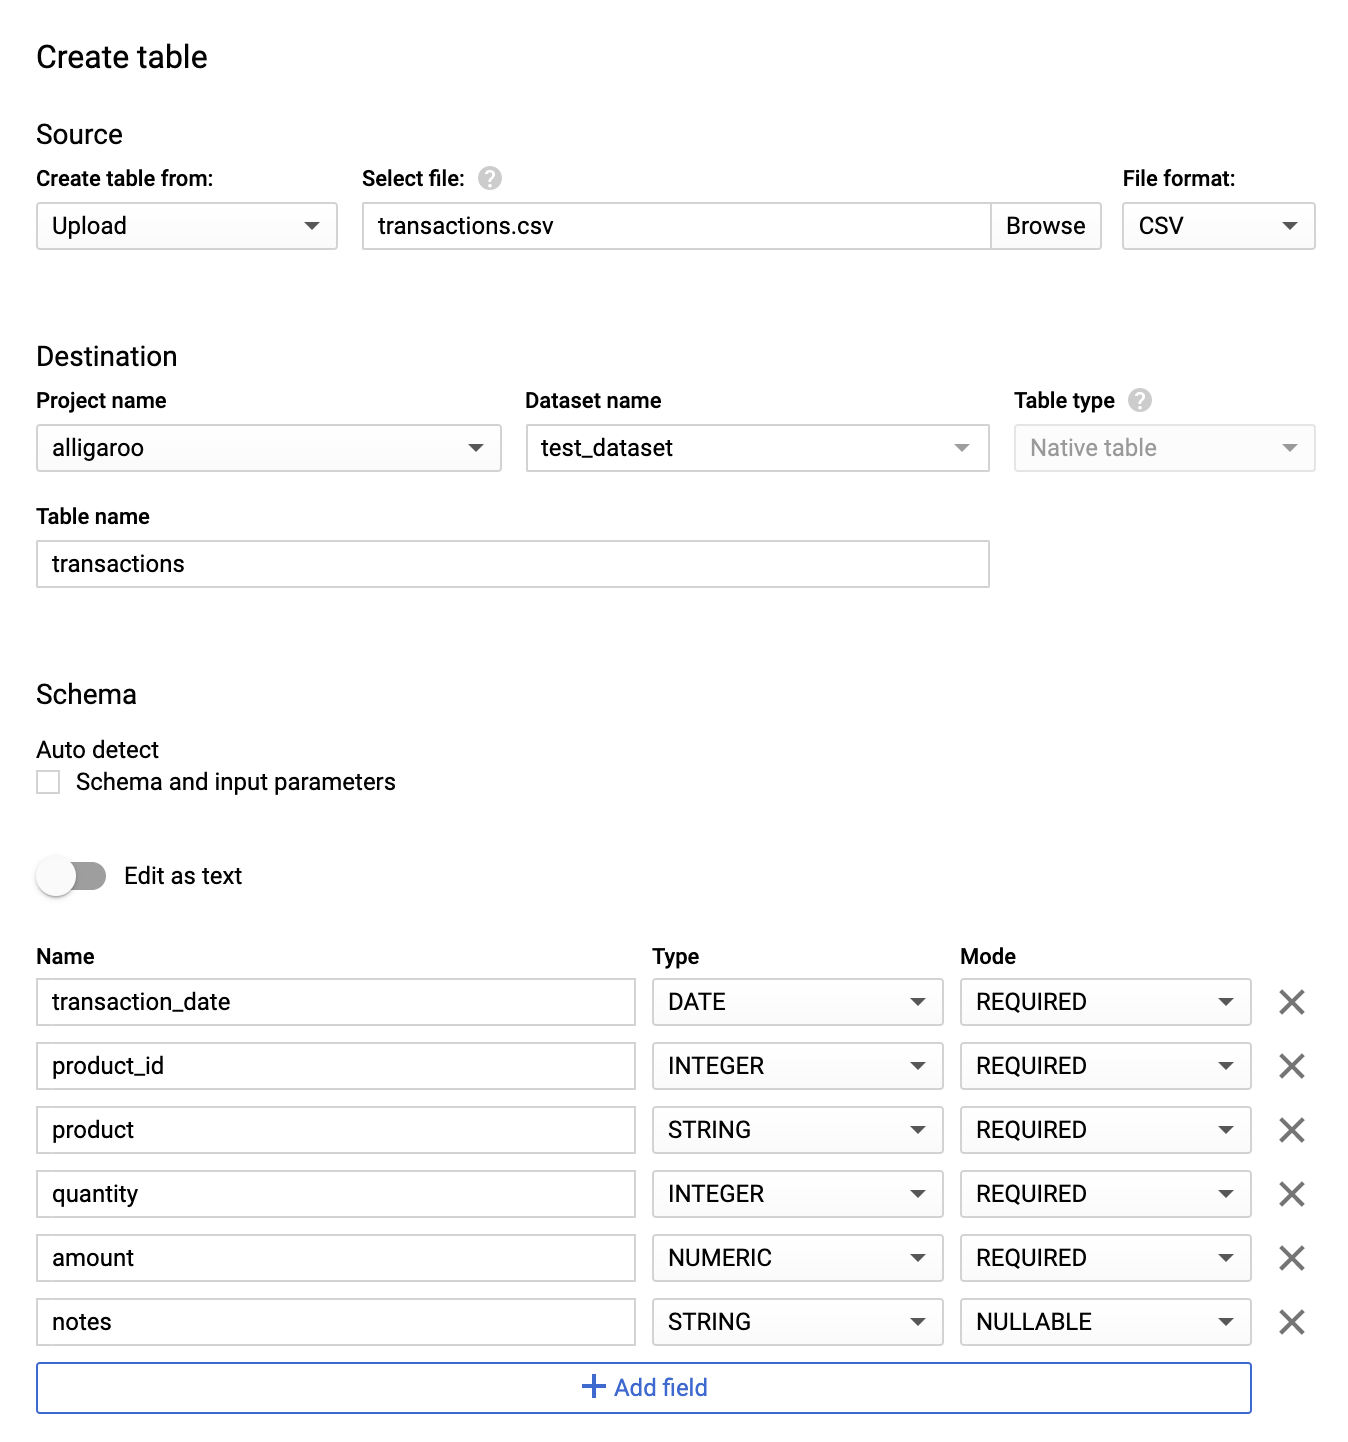
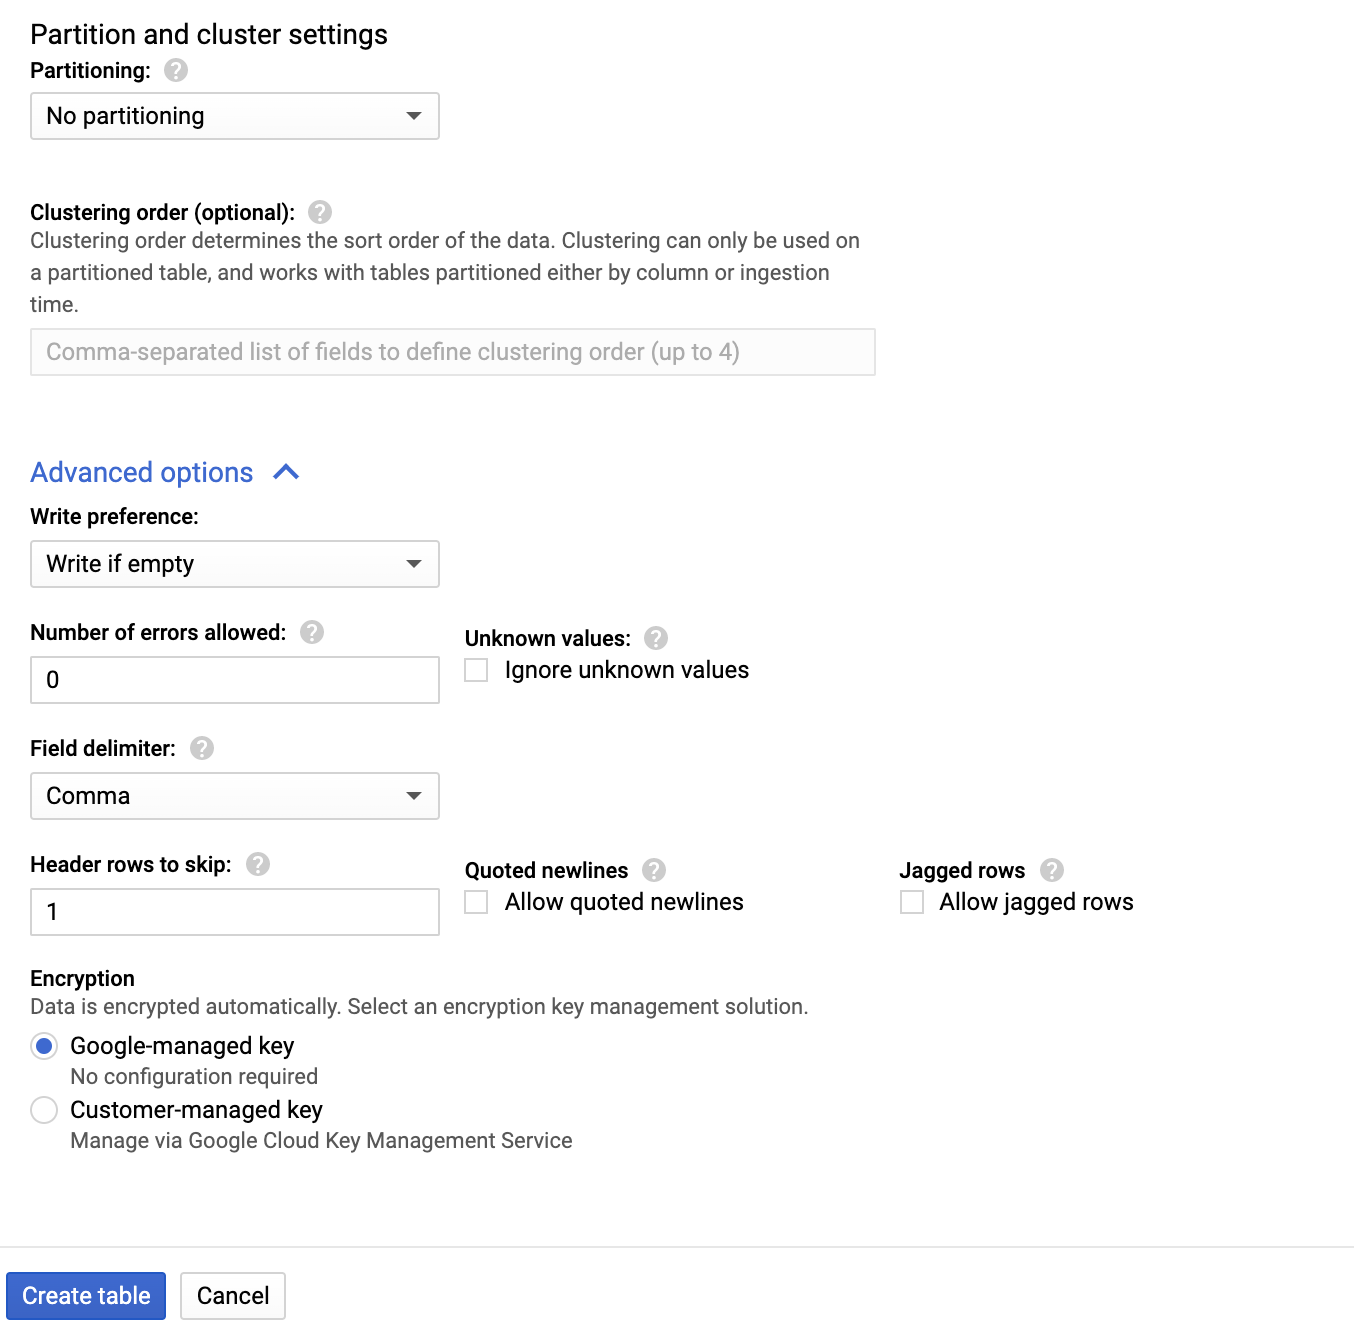
Click the CREATE TABLE button and fill out the form like this.
Some notes..
- Here we made a table with data by uploading a CSV file and explicitly defining our table’s schema.
- If our data didn’t conform to our schema, google would throw an error (e.g. if our schema had more columns than our data.)
- We initialized our table with data, but we could’ve built an empty table (i.e. a table with a schema and no data)
- We could’ve checked the “Schema Auto Detect” box and Google would’ve inferred a schema for our table based on our data. ..but don’t do this unless you want to deal with headaches down the road.
- We defined the amount column as NUMERIC type instead of FLOAT. NUMERIC is more appropriate for financial values because it’s more precise than FLOAT, but it also takes up more space. Check out the Standard SQL Datatypes for details on this.
- See the partitioning parameter we left blank? It’s good practice to use a partition as it’ll make your queries faster and more efficient, saving you $$$. More on that later…
- We told Google to skip the first row in our data file because it contains headers, not data.
After you click the Create table button, BigQuery launches a “job” that you can monitor in the Job history tab of the BigQuery UI.

You can see I made a couple mistakes before I successfully created my table. If you click on one of these jobs, you can dig into the details, like when the job fired and what errors occurred. This is super helpful. I should note some common errors when making a table are
- If you have a date, datetime, time, or timestamp field, make sure it’s formatted properly.
- If your data has a header row, you have to tell Google to skip it.
- Your data should not include escape characters.
If you run into a lot of errors uploading data, pick out a small sample of your data and try uploading that. Also try making a schema of all STRINGS and allowing every field to be NULLABLE. See if you can isolate the problem and go from there.
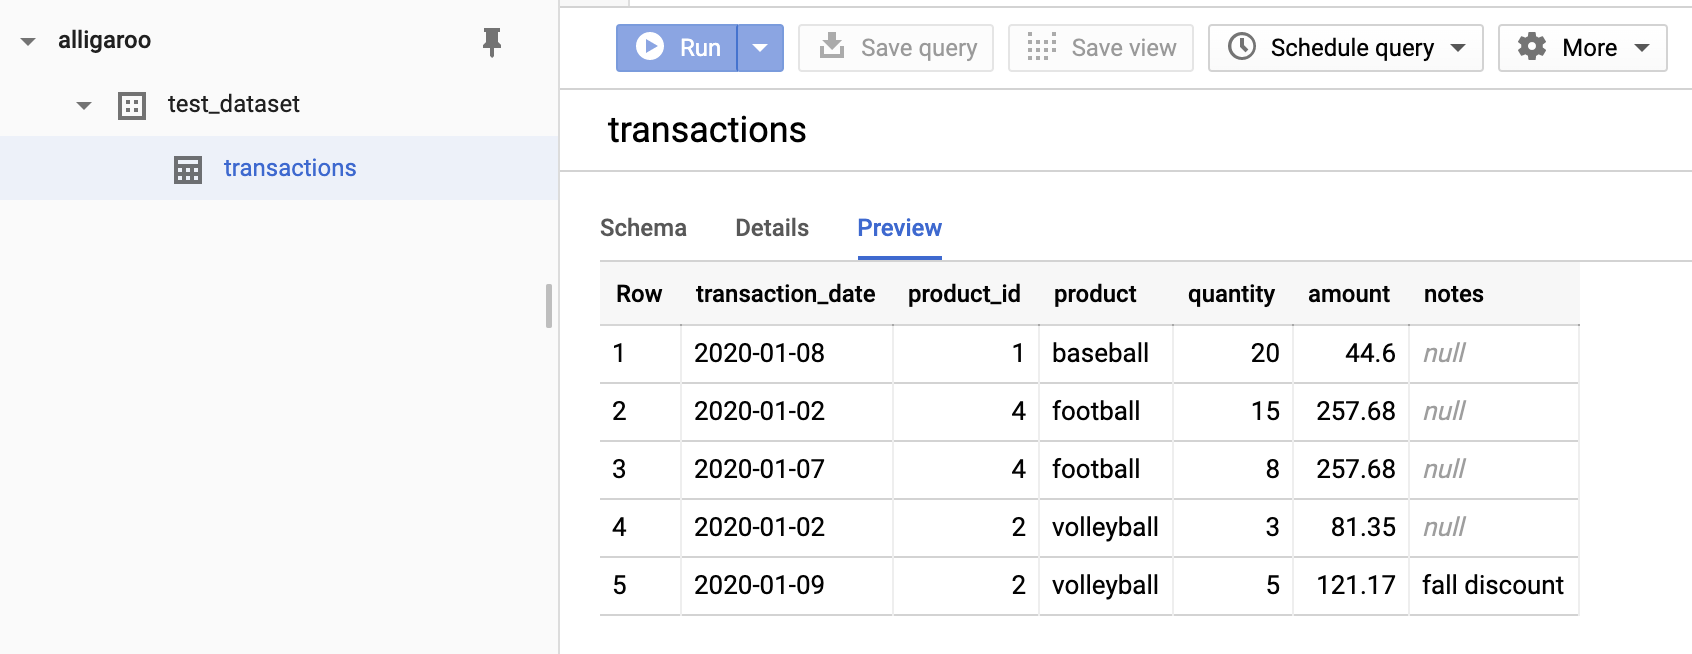
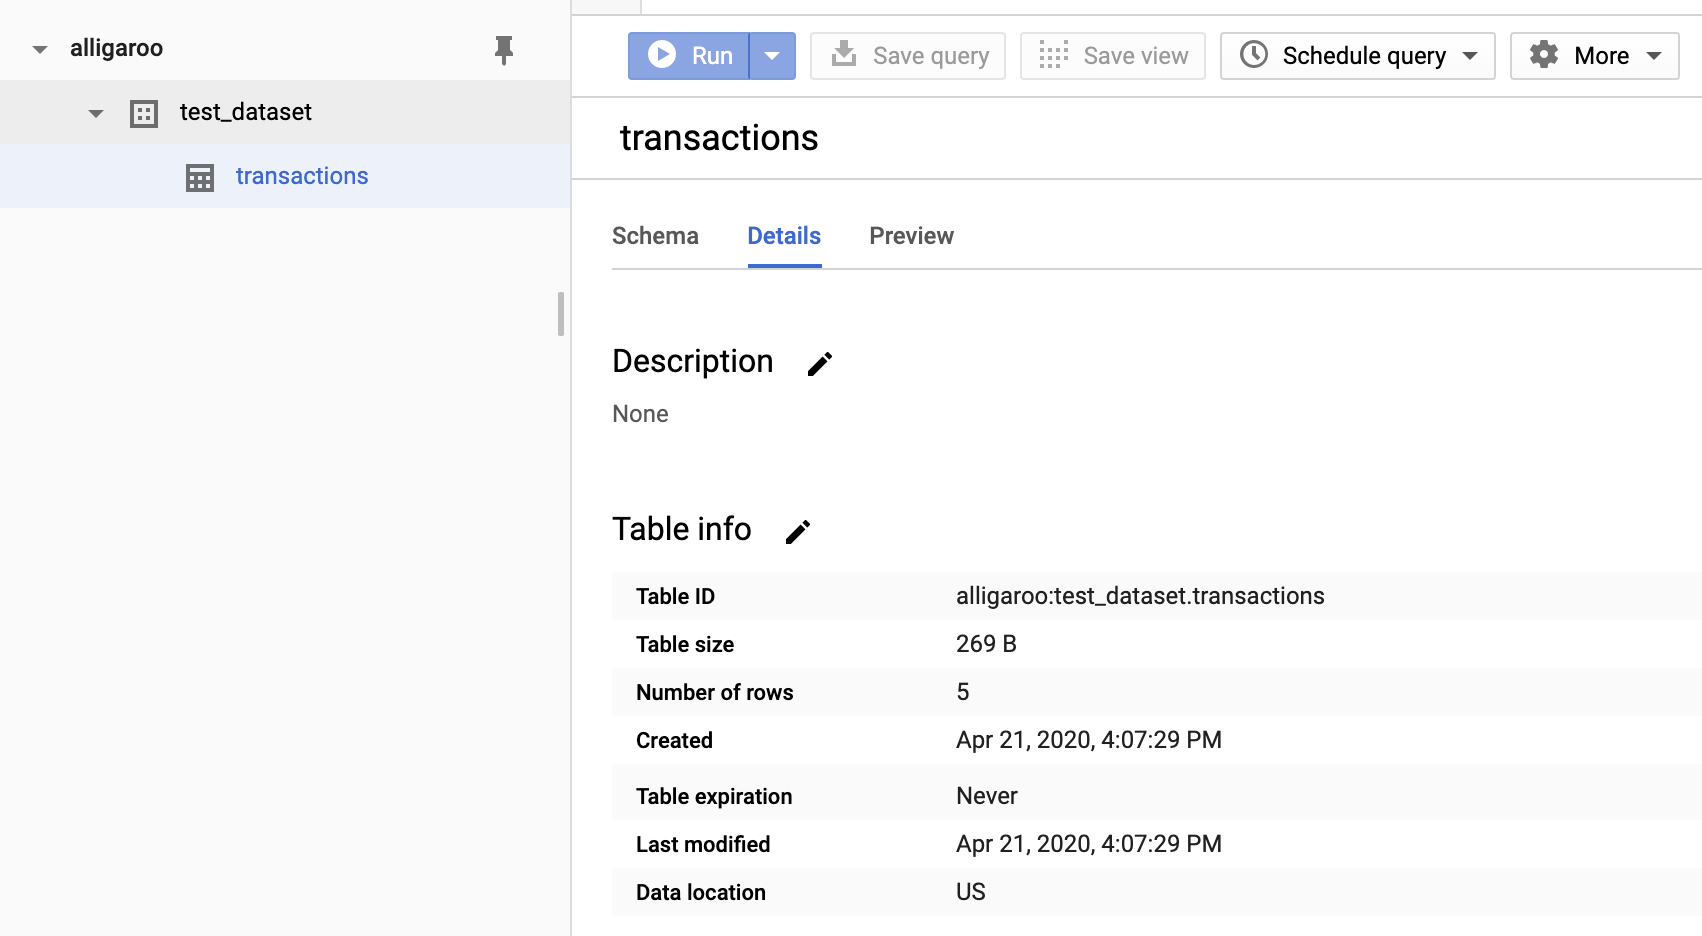
At this point we can click on our table in the UI and view a preview of the data as well as the table details.
3. Transferring Data From Google Cloud Storage To BigQuery
Now let’s append some data to our existing table via a BigQuery Data Transfer from Google Cloud Storage. The data we’ll append is in another CSV file named transactions_2020-01-10.csv.

Here’s this gist of how this works.
- We’ll make a Google Cloud Storage Bucket and then dump our CSV file in it
- We’ll create a BigQuery Data Transfer job, telling it to pull the CSV file from GCS into our transactions table in BigQuery
- We’ll run the job “on demand” and confirm that the data was appended to our table successfully
There are a few quirks to this process which I’ll try to highlight.
Creating A GCS Bucket With Our CSV File
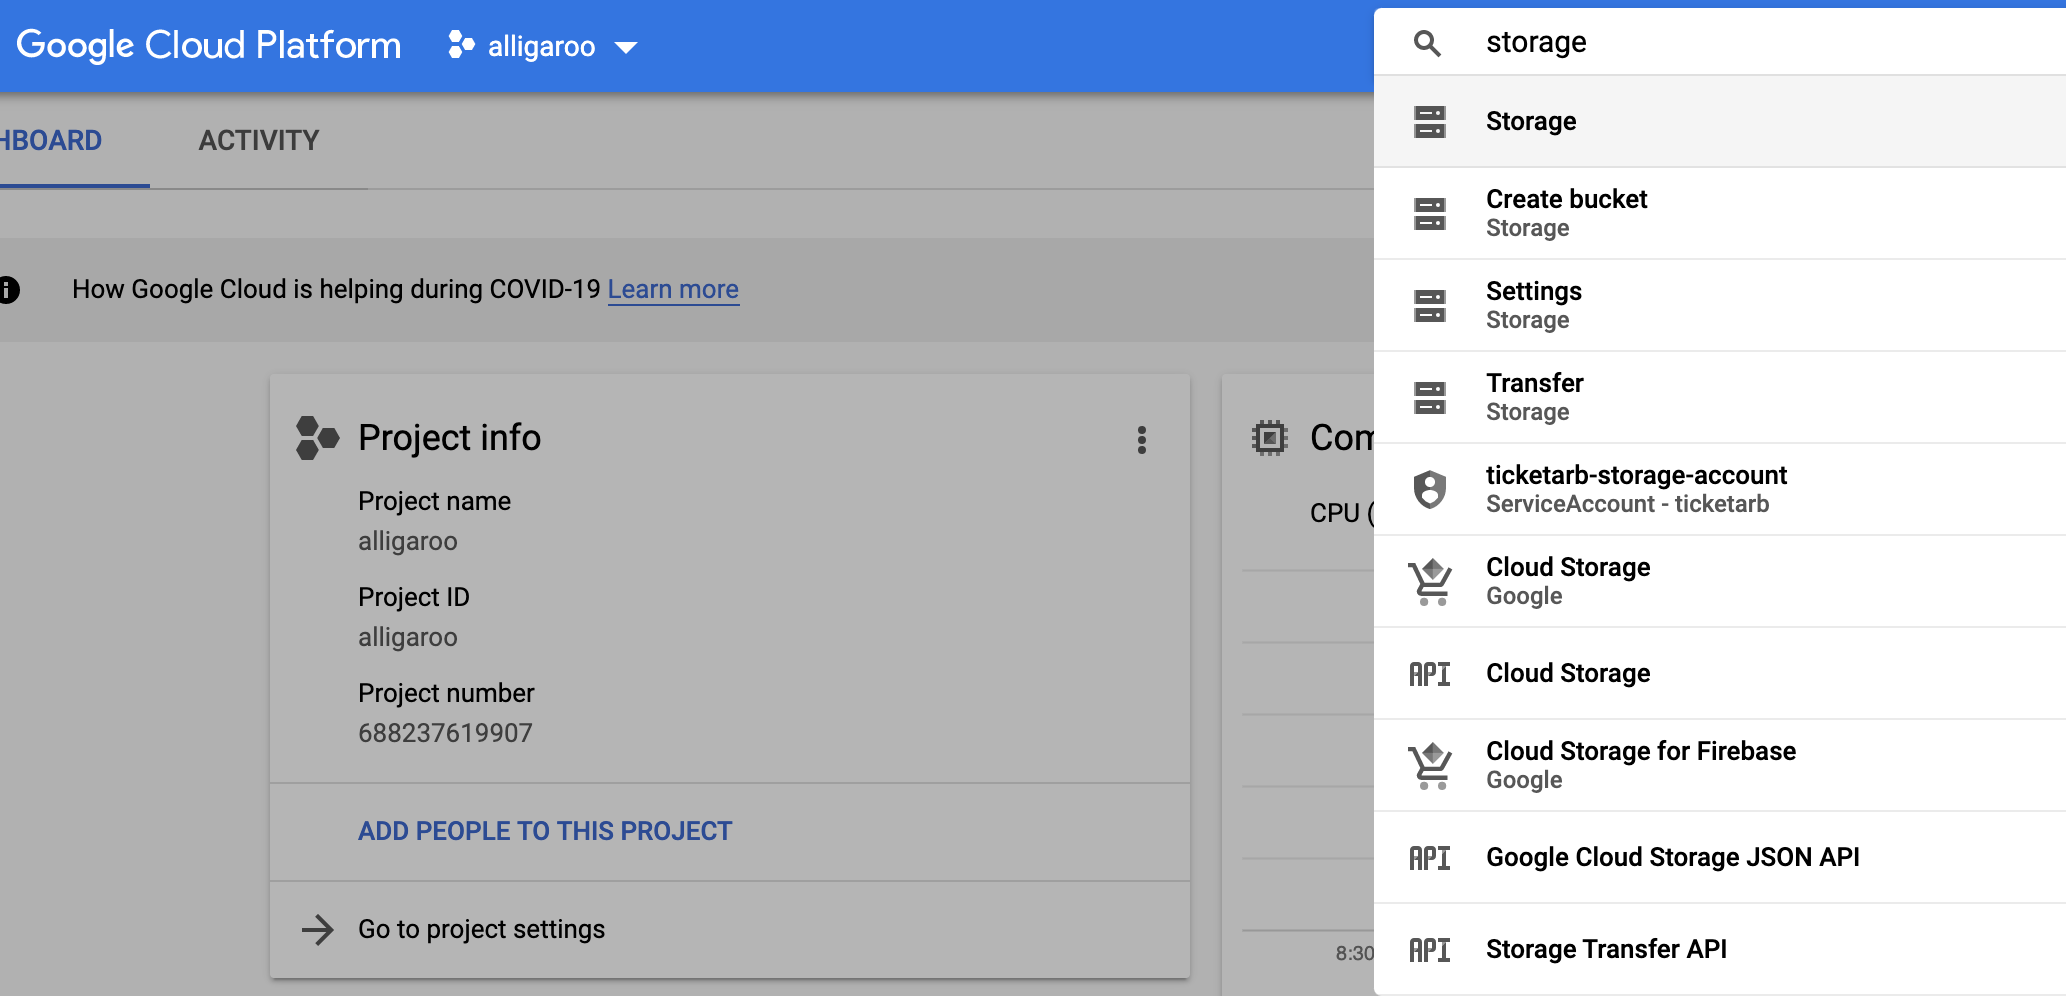
First we need to make a GCS bucket to store our CSV file. Search for and select Storage in the search bar.
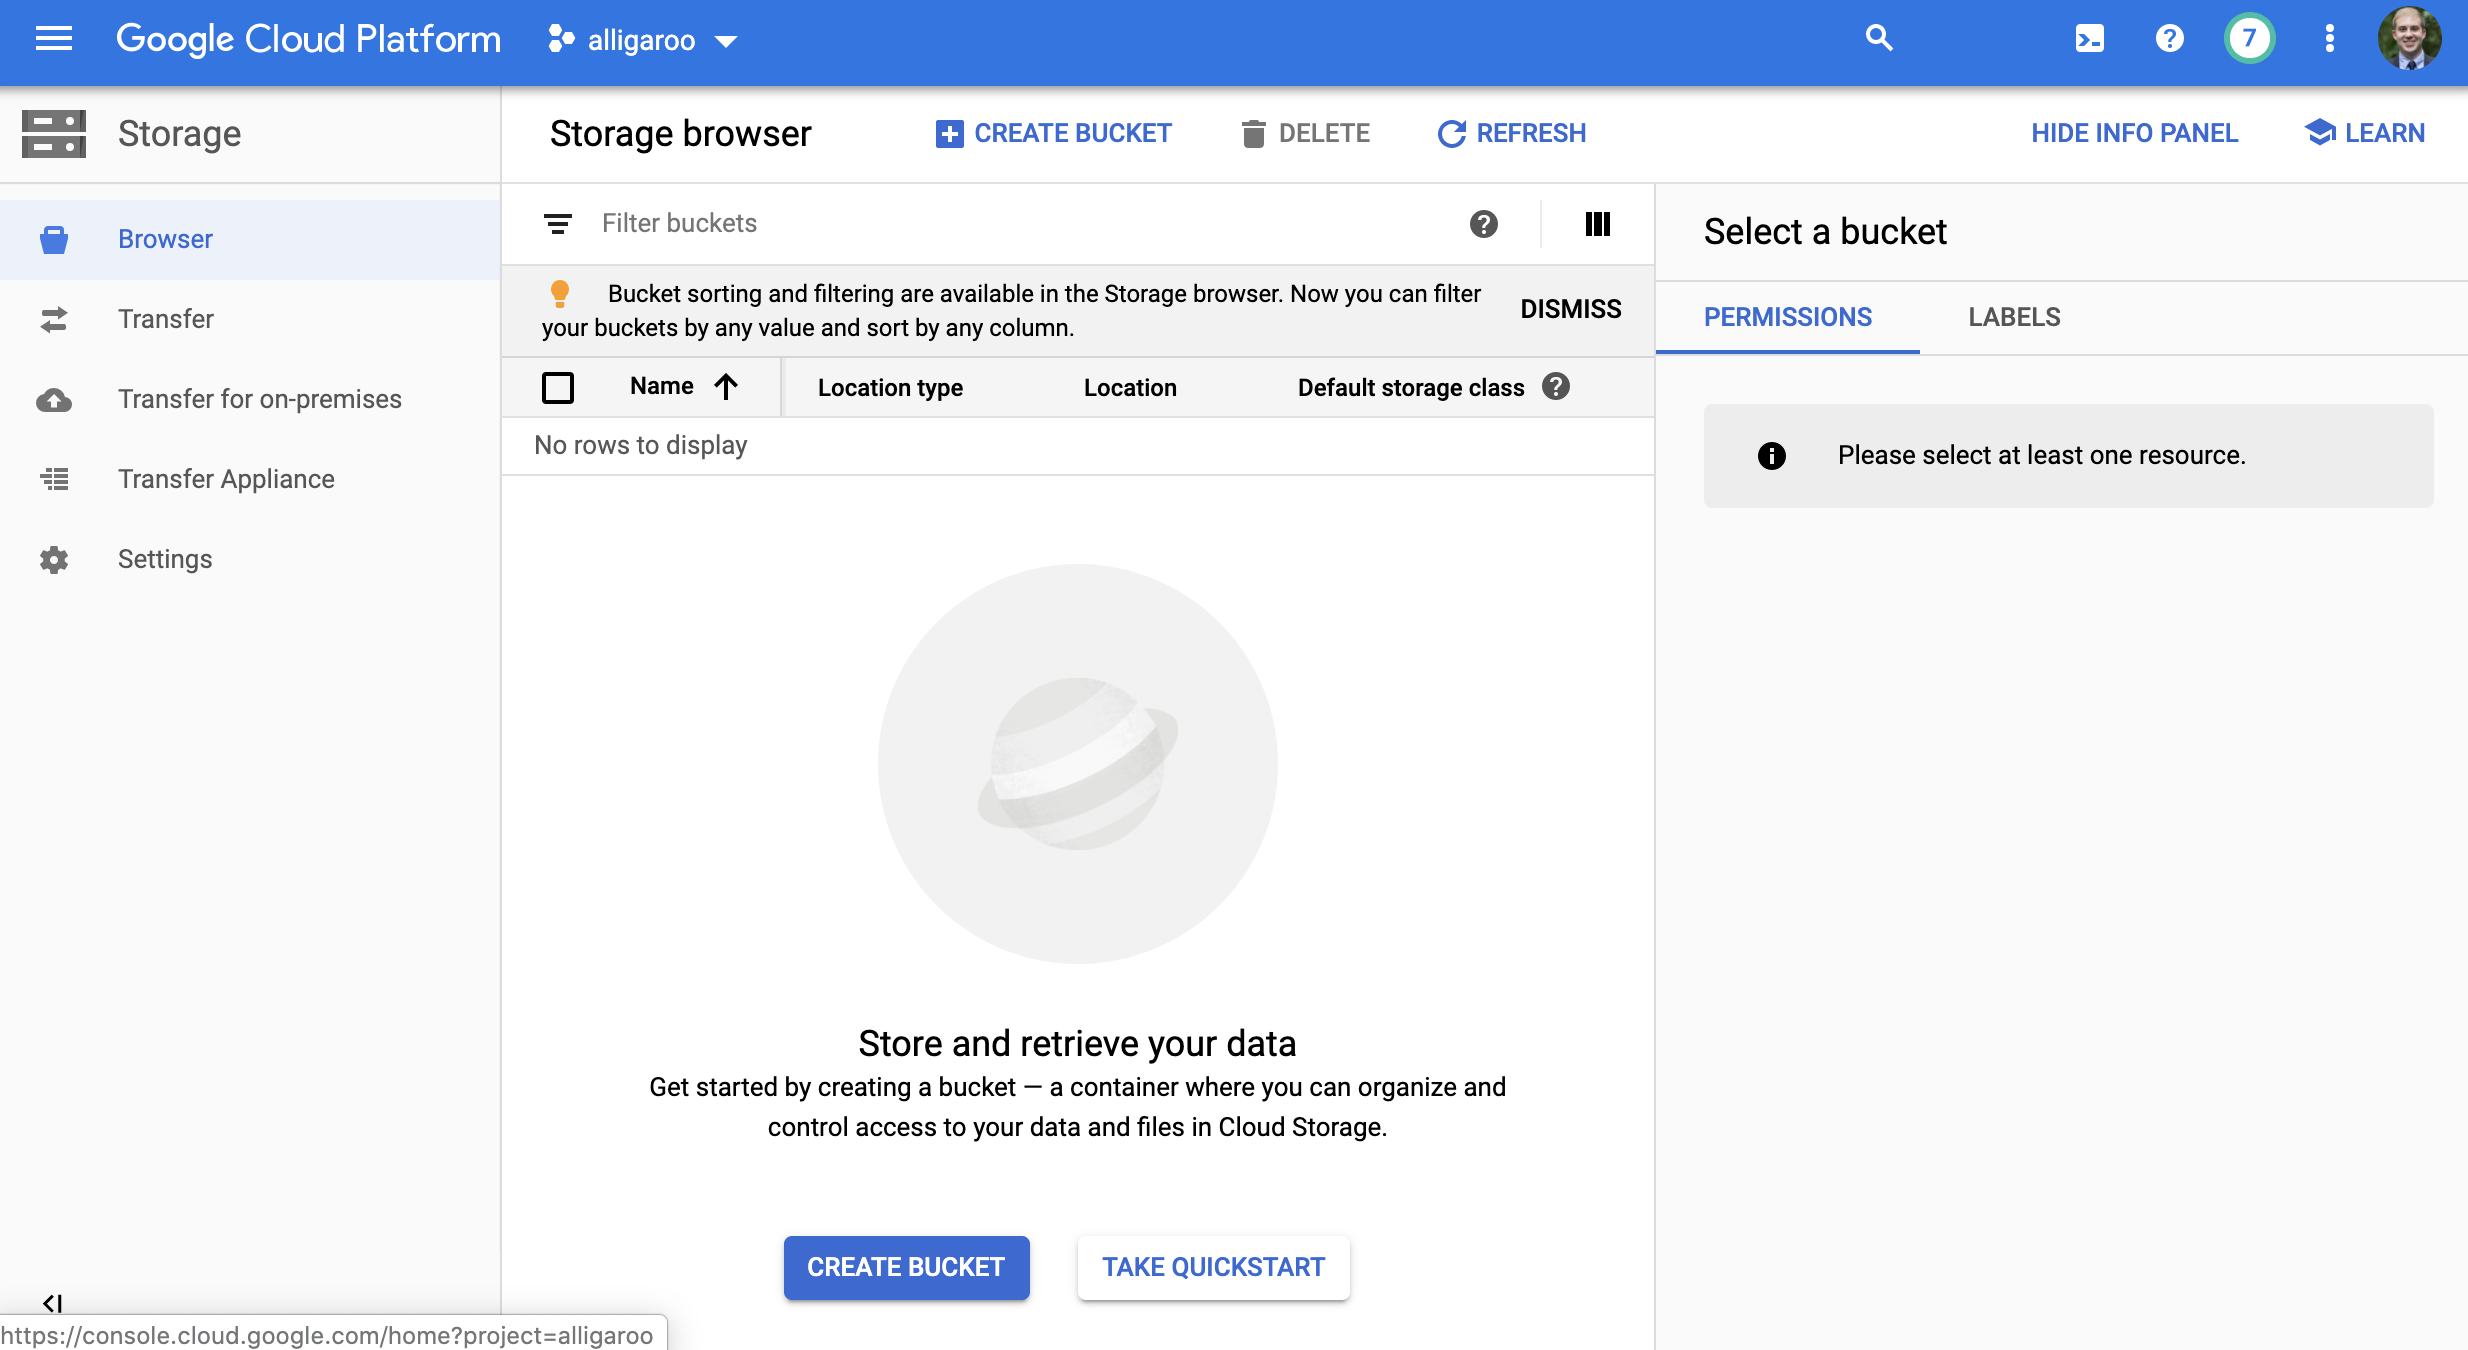
Then CREATE BUCKET
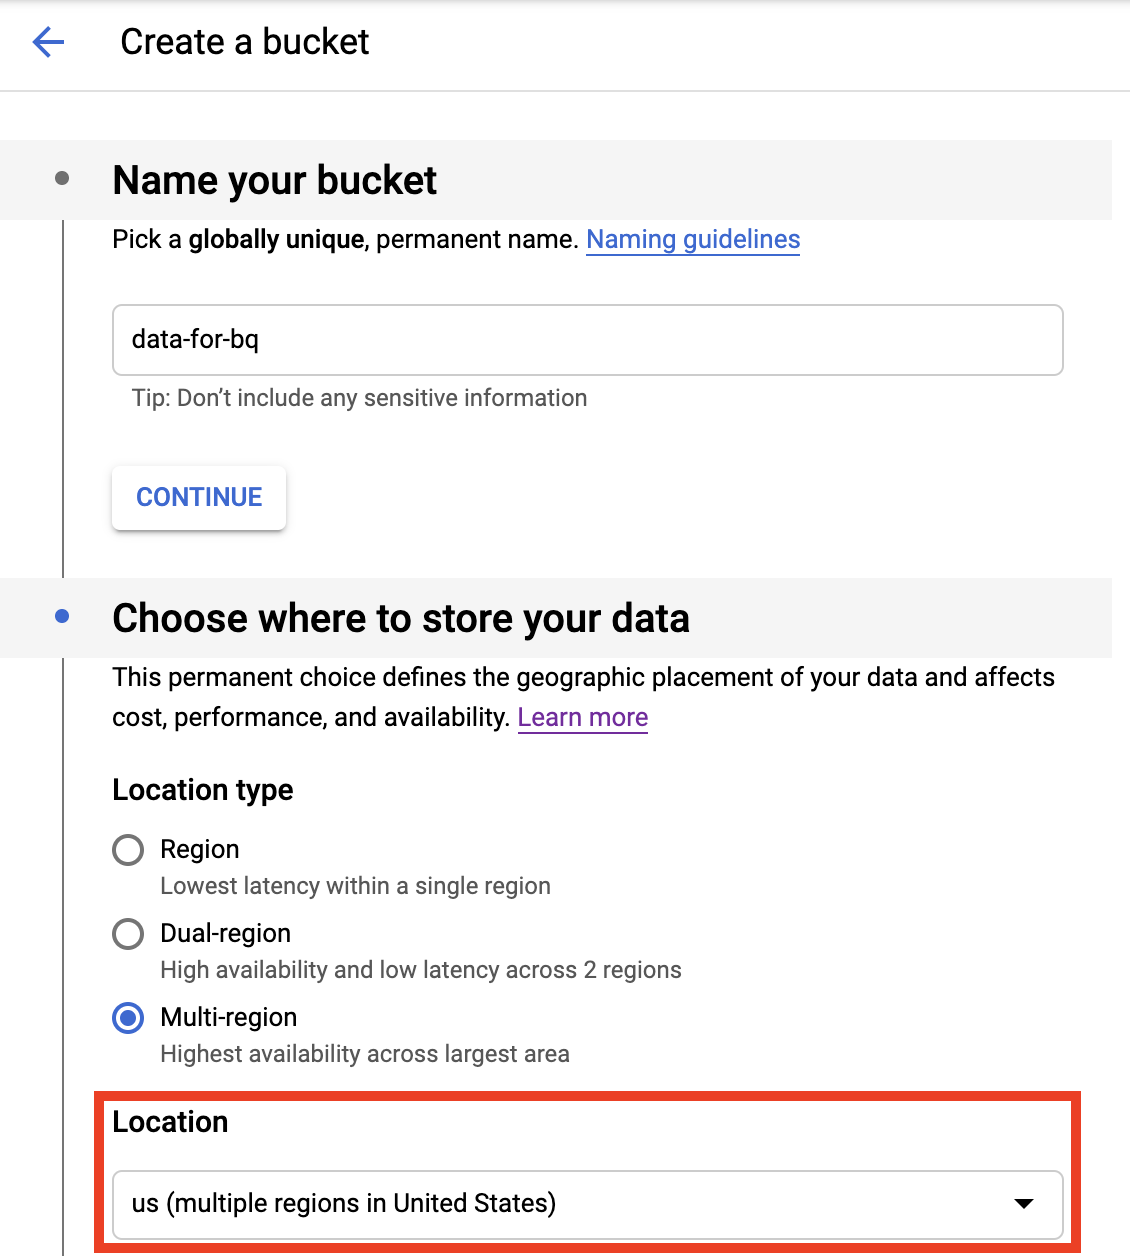
Give your bucket a unique name and select the same location you chose for your BigQuery dataset!
Once your bucket is created, select it from the GCS UI, click Upload files, and upload transactions_2020-01-10.csv to the bucket.
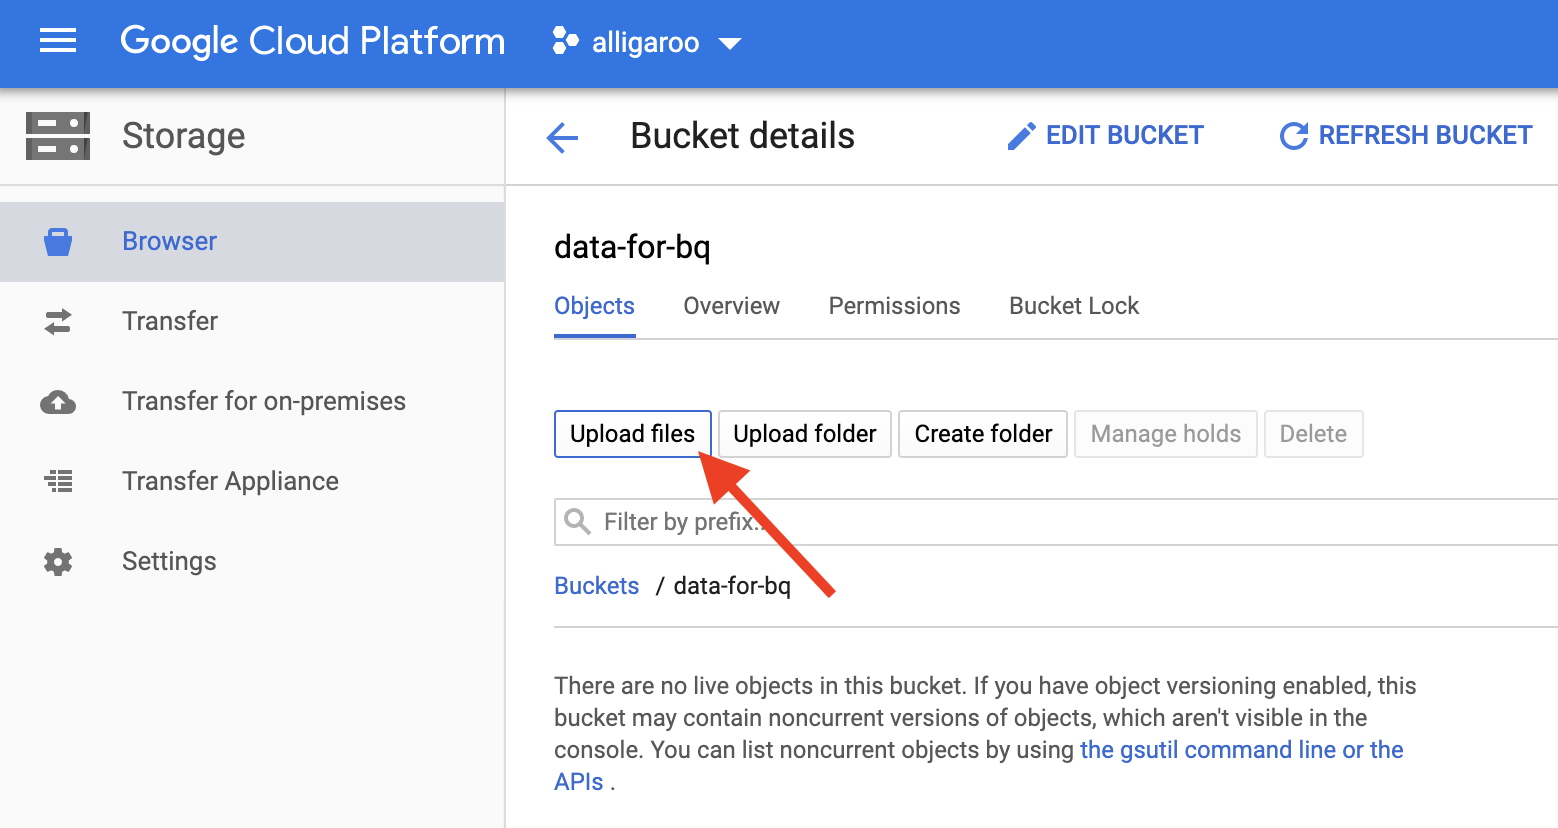
At this point you should have one file, transactions_2020-01-10.csv, sitting in your bucket. Now we need to set up a transfer job to push it to BigQuery.
Setting Up A BigQuery Transfer
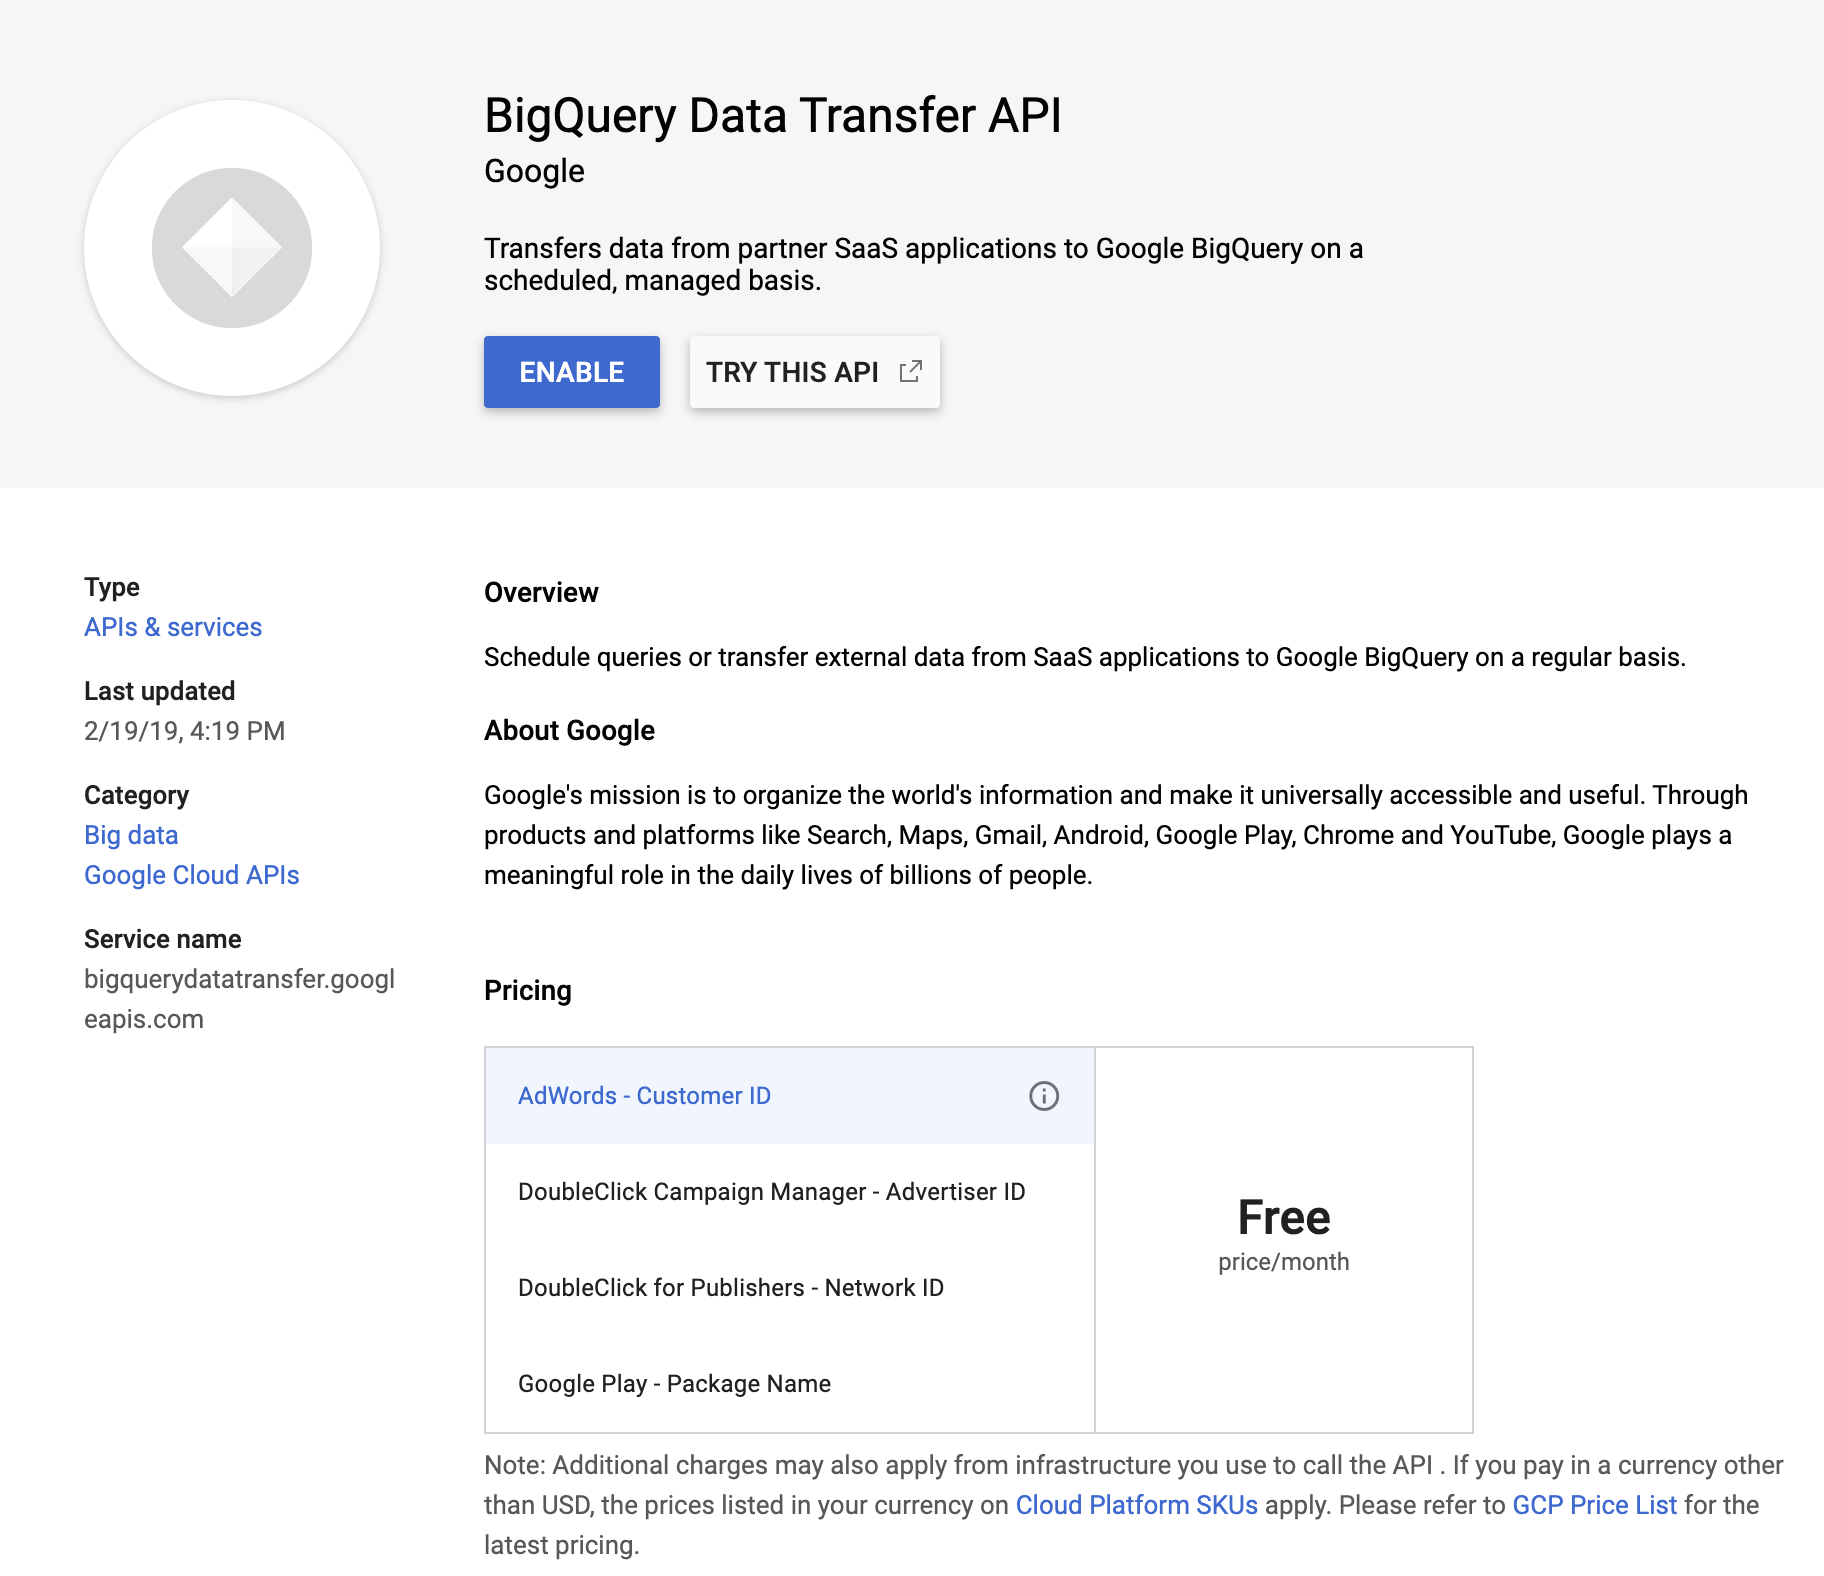
Navigate back to the BigQuery Web UI and click on Transfers in the sidebar. You should be prompted to ENABLE to BigQuery Data Transfer API. Click ENABLE.
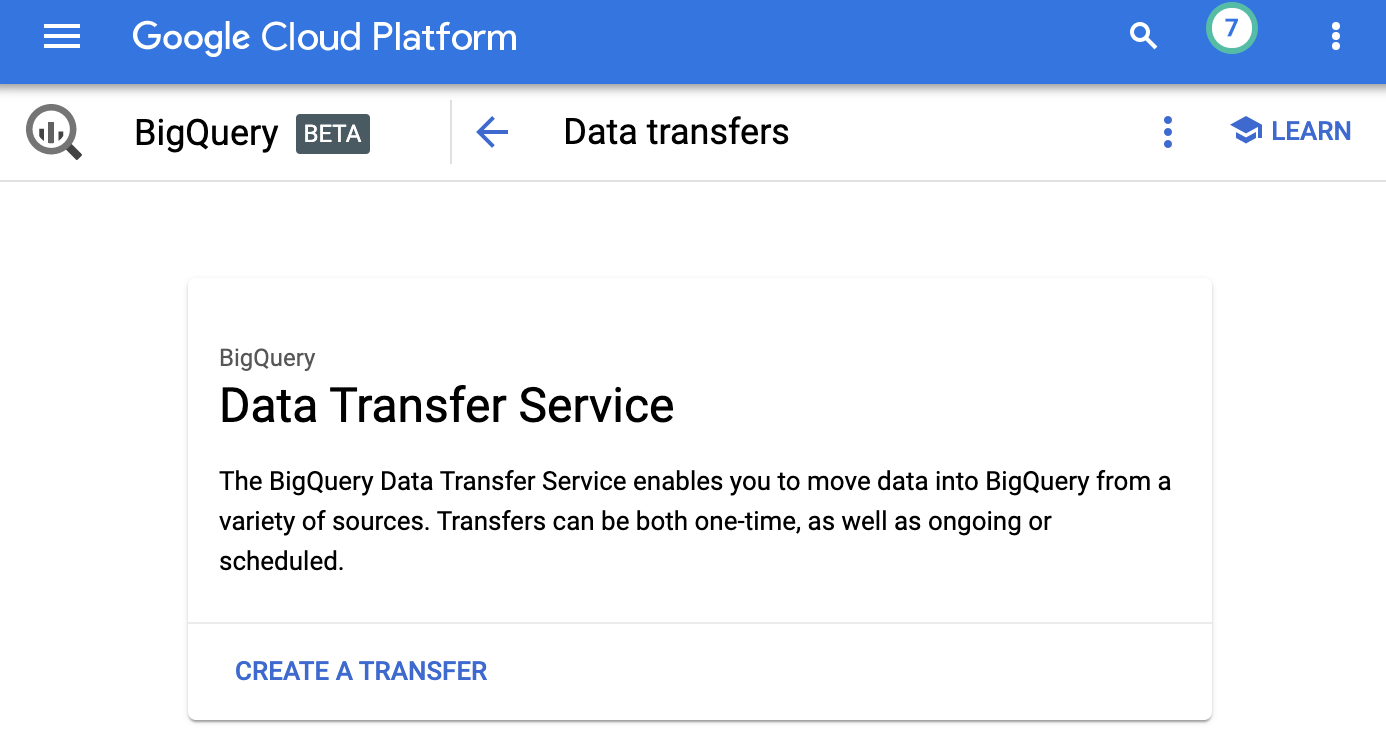
Now you should be presented with the BigQuery Data Transfer Web UI. This is where you can create transfer jobs to move data from GCS, AWS S3, and other sources into BigQuery. Let’s CREATE A TRANSFER.
Fill out the transfer form.

- Source type: What service to pull data from (e.g. GCS, AWS S3)
- Transfer config name: What to call this transfer
- Schedule options: How often should this transfer run? Daily, Weekly, Monthly, or On-demand?
- Dataset ID: Which BigQuery destination dataset to write to
- Destination Table: Which BigQuery destination table to write to
- Cloud Storage URI: Which source file or files to read from
- Write preference: APPEND or MIRROR
- File format: Format of the input file(s)
- Header rows to skip: If your data files have header rows, how many?
(If you’re wondering how to transfer multiple files and/or files with a dynamic filename, this is addressed below.)
Then save the transfer. Now you should see a page with your transfer details like this. Go ahead and run the transfer by clicking More > Run transfer now.

Navigate back to the Data transfers page and you should see a list of all your transfers.

The hollow green circle next to my-transfer means it’s running. (It’ll turn solid green when finished.) Click on the transfer and click on the active/completed run to view the logs.
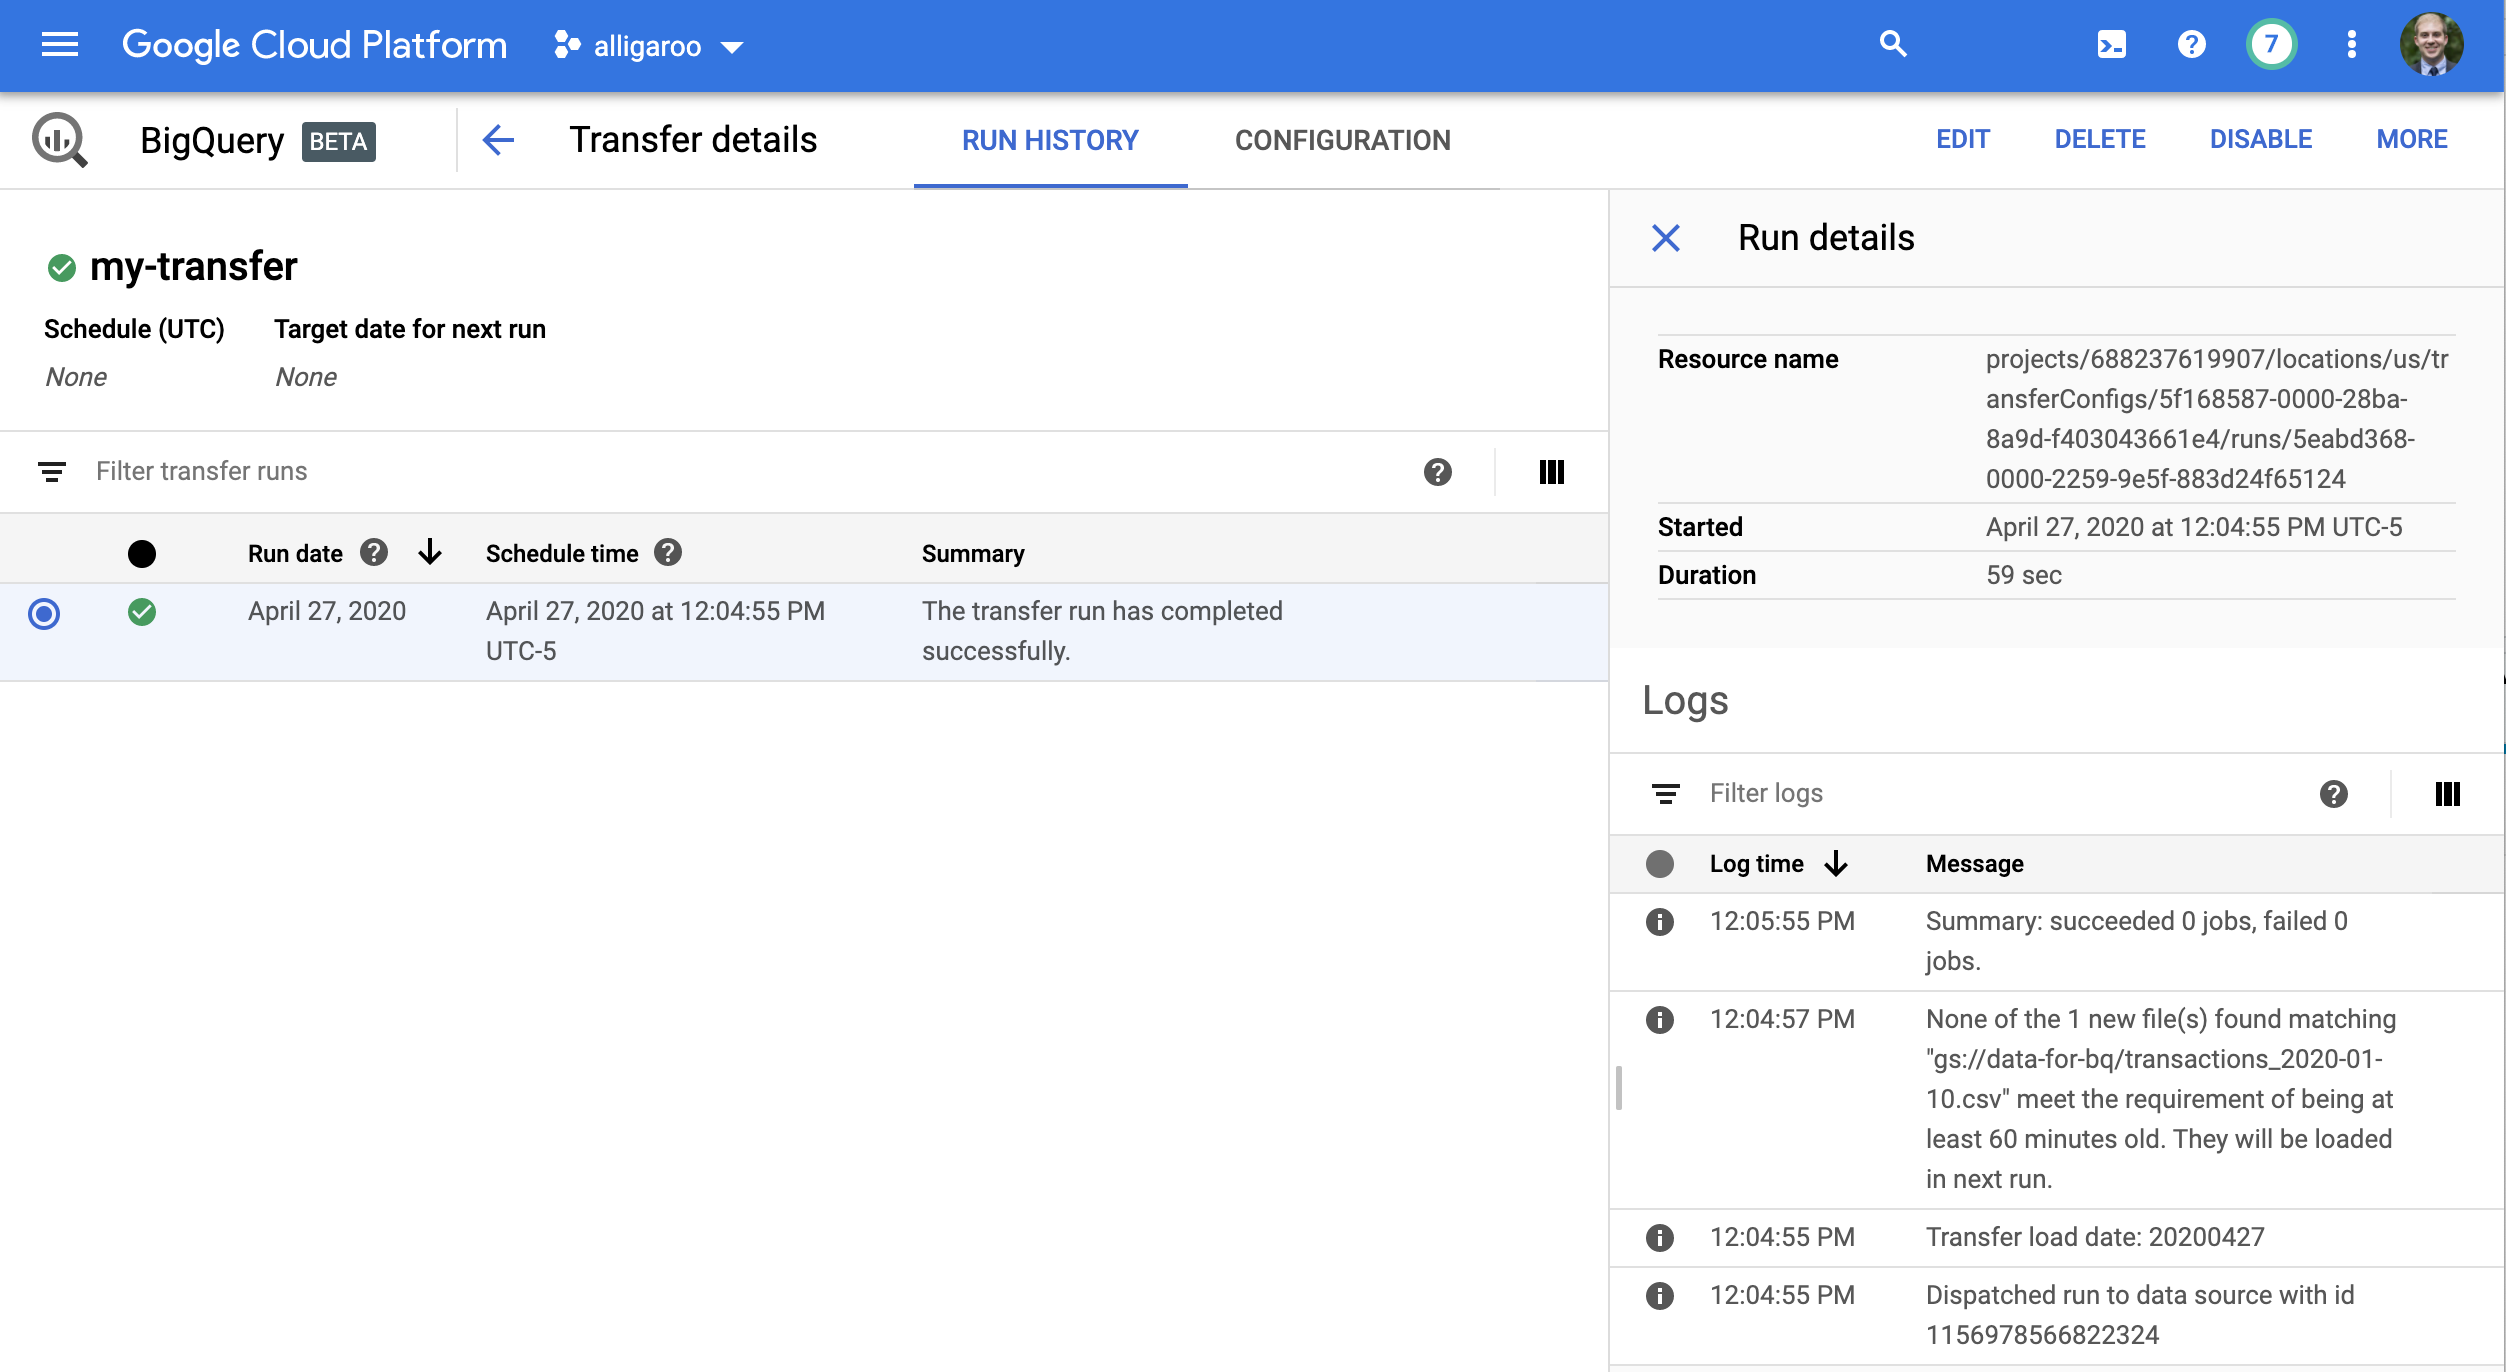
Notice my transfer completed “0 jobs”. This means it ran without error, but it didn’t append any data. Looking closer at the logs, notice this message.
None of the 1 new file(s) found matching gs://data-for-bq/transactions_2020-01-10.csv meet the requirement of being at least 60 minutes old. They will be loaded in the next run.
Yes, this is a thing. Your files need to be at least 60 minutes old (with respect to when they were added/modified on GCS). …60 minutes later we try again…
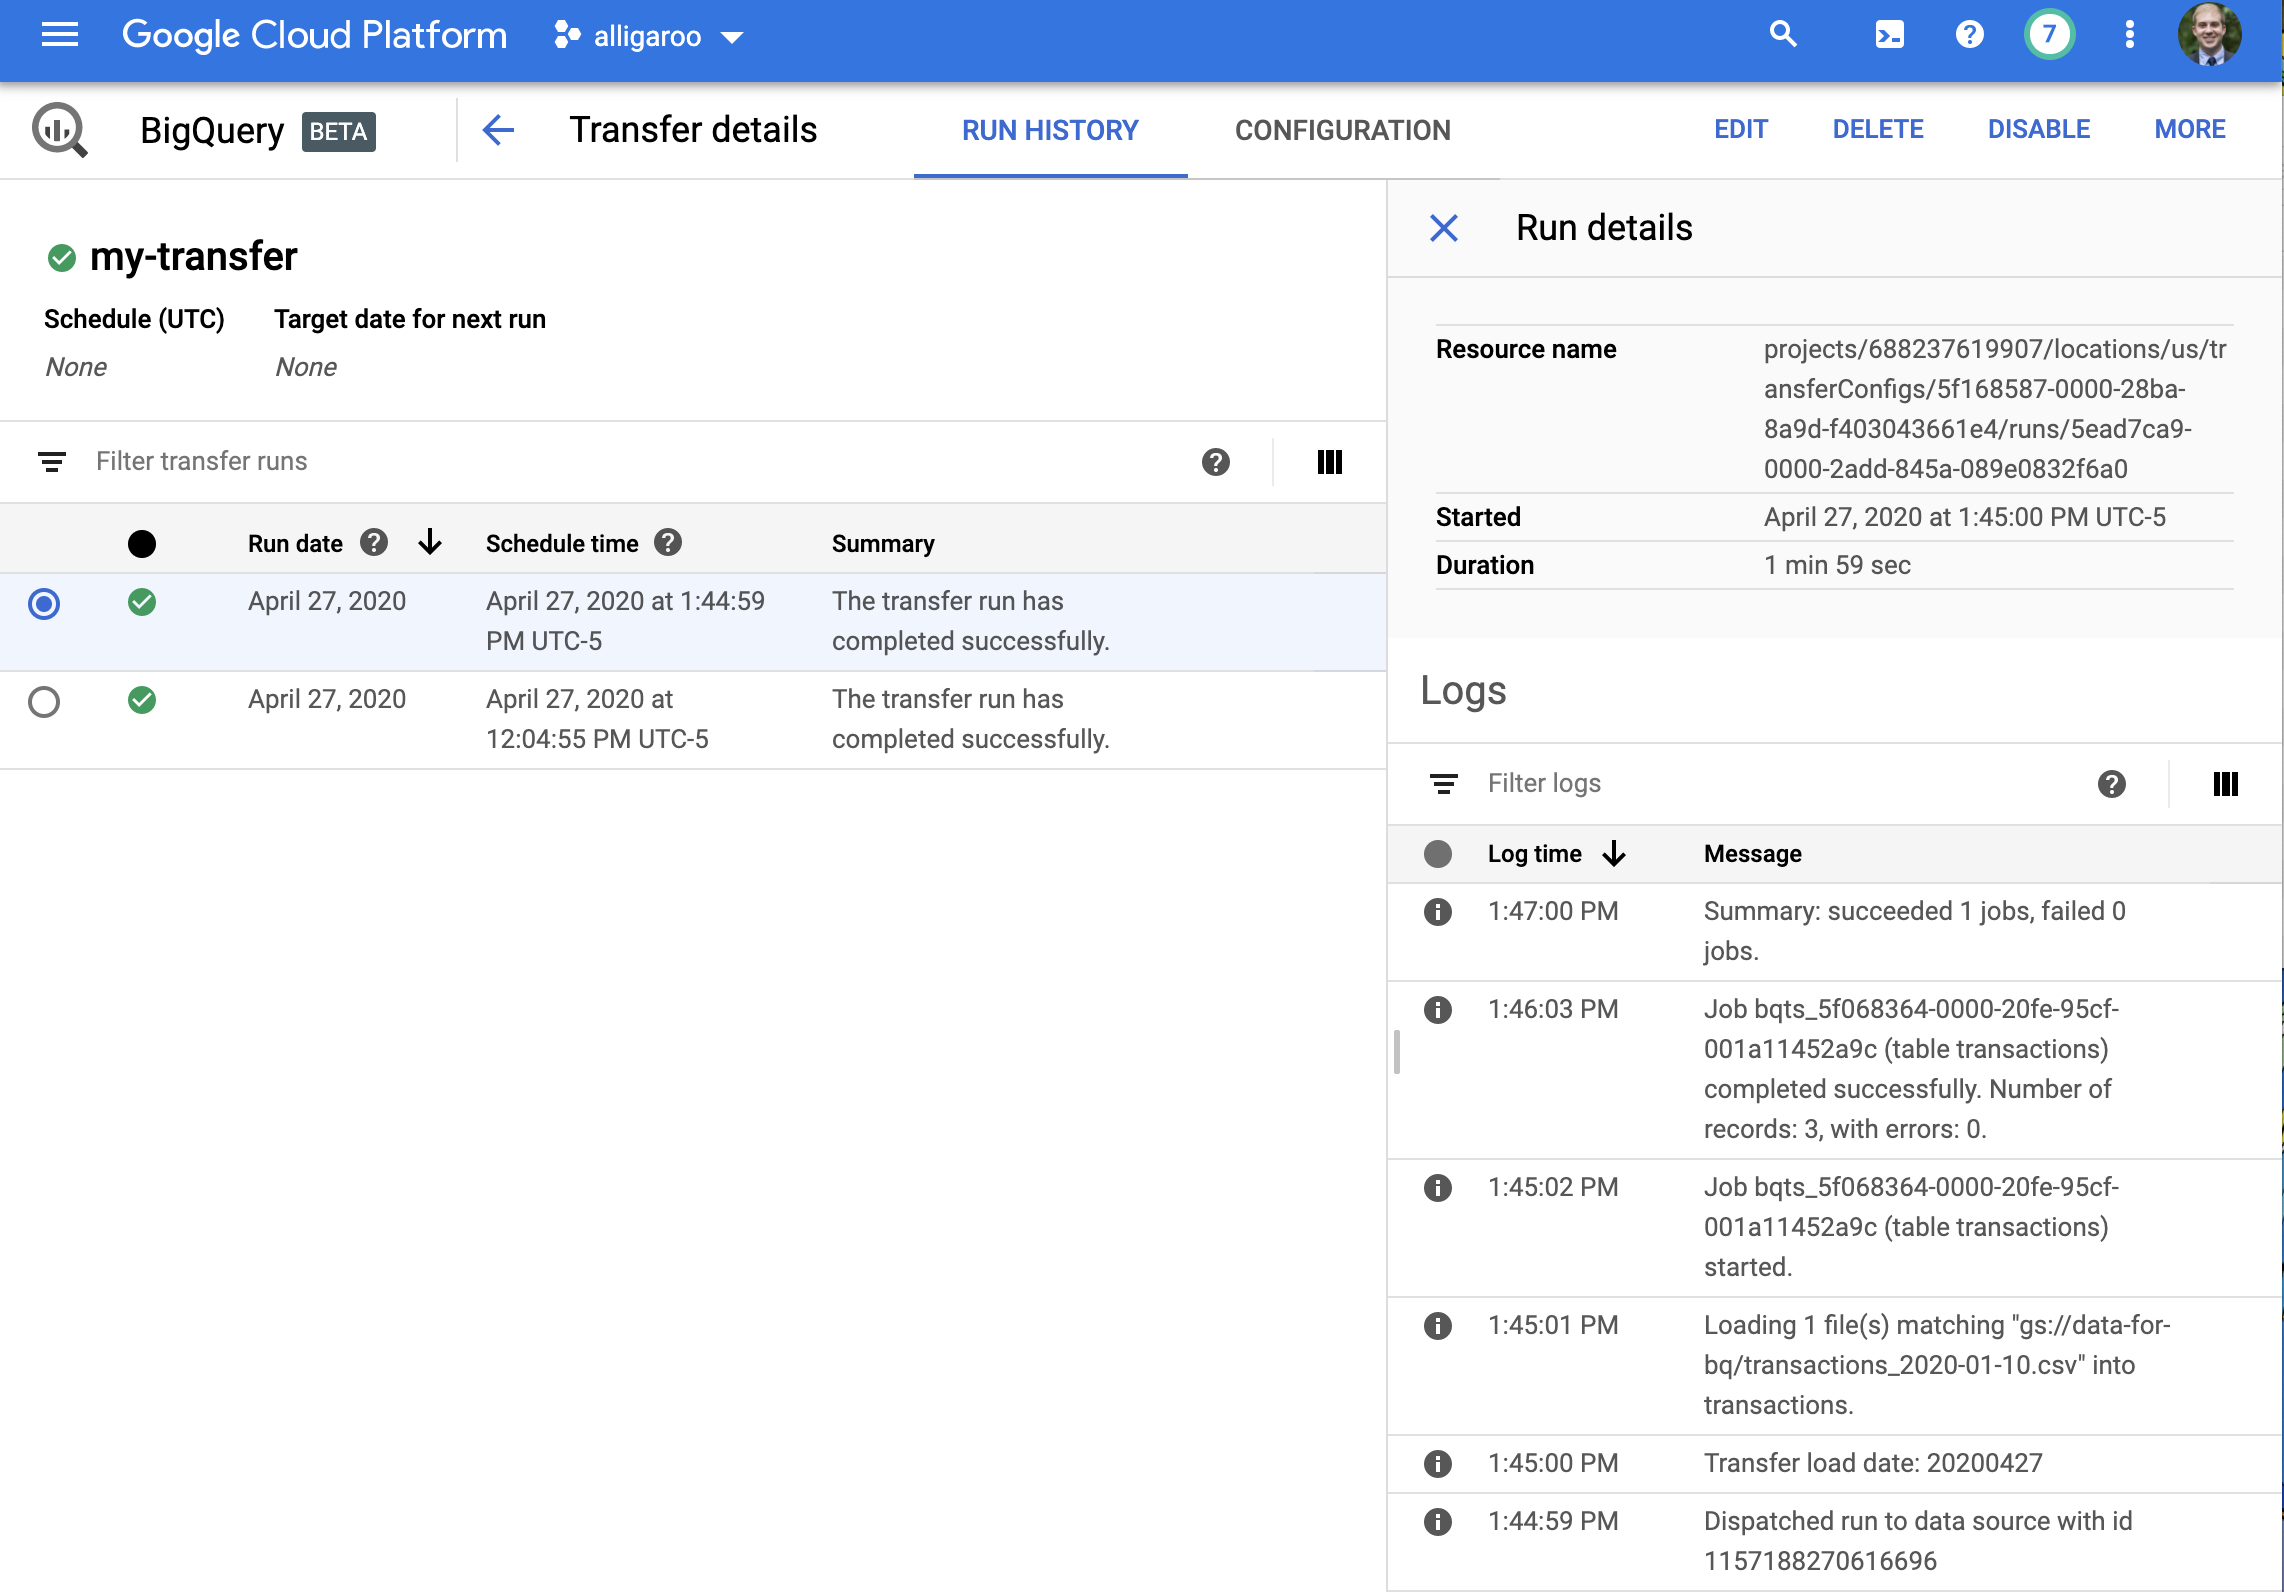
Voila! We’ve successfully appended three records to our transactions table.
If we try to run the same transfer again without modifying our data file, we’ll actually get a message stating
No new files found matching: “gs://data-for-bq/transactions_2020-01-10.csv”
So, google won’t re-upload the same data twice. ..but I couldn’t find any mention of this in the official docs, so users beware!
Transferring Files Dynamically
What if you want to transfer multiple files with non-static file names? For example, in my real-world use case, I had a system that sent hourly files to my GCS bucket with file formats like

There are a few ways to accomplish this, each regarding your specification for Cloud Storage URI in the Data transfer form.
- You can select “everything in bucket xyz” via
Cloud Storage URI = xyz/ - You can select “everything in bucket xyz, subfolder foo” via
Cloud Storage URI = xyz/foo/* - You can select “all files in bucket xyz ending with .csv.gz” via
Cloud Storage URI = xyz/*.csv.gz
“*” here is a wildcard, and you can use it in lots of other ways to select files to be transferred.
4. Transferring Data From AWS S3 To BigQuery
You might also be interested in transferring data from AWS to BigQuery. The process is more or less the same as above, with a couple gotchas.
- From what I can tell, Google actually transfers your data from AWS to a temporary Google Cloud Storage bucket, and then makes its way to BigQuery
- When transferring data from S3, you lose the option to delete the source files after the transfer runs
5. Querying Your Data
The easiest way to start querying your data is from the Query editor in the BigQuery Web UI. You can write queries using SQL, and BigQuery has lots of documentation on this. To get you started, let’s write a simple query that selects rows from our transactions table where product = "football".
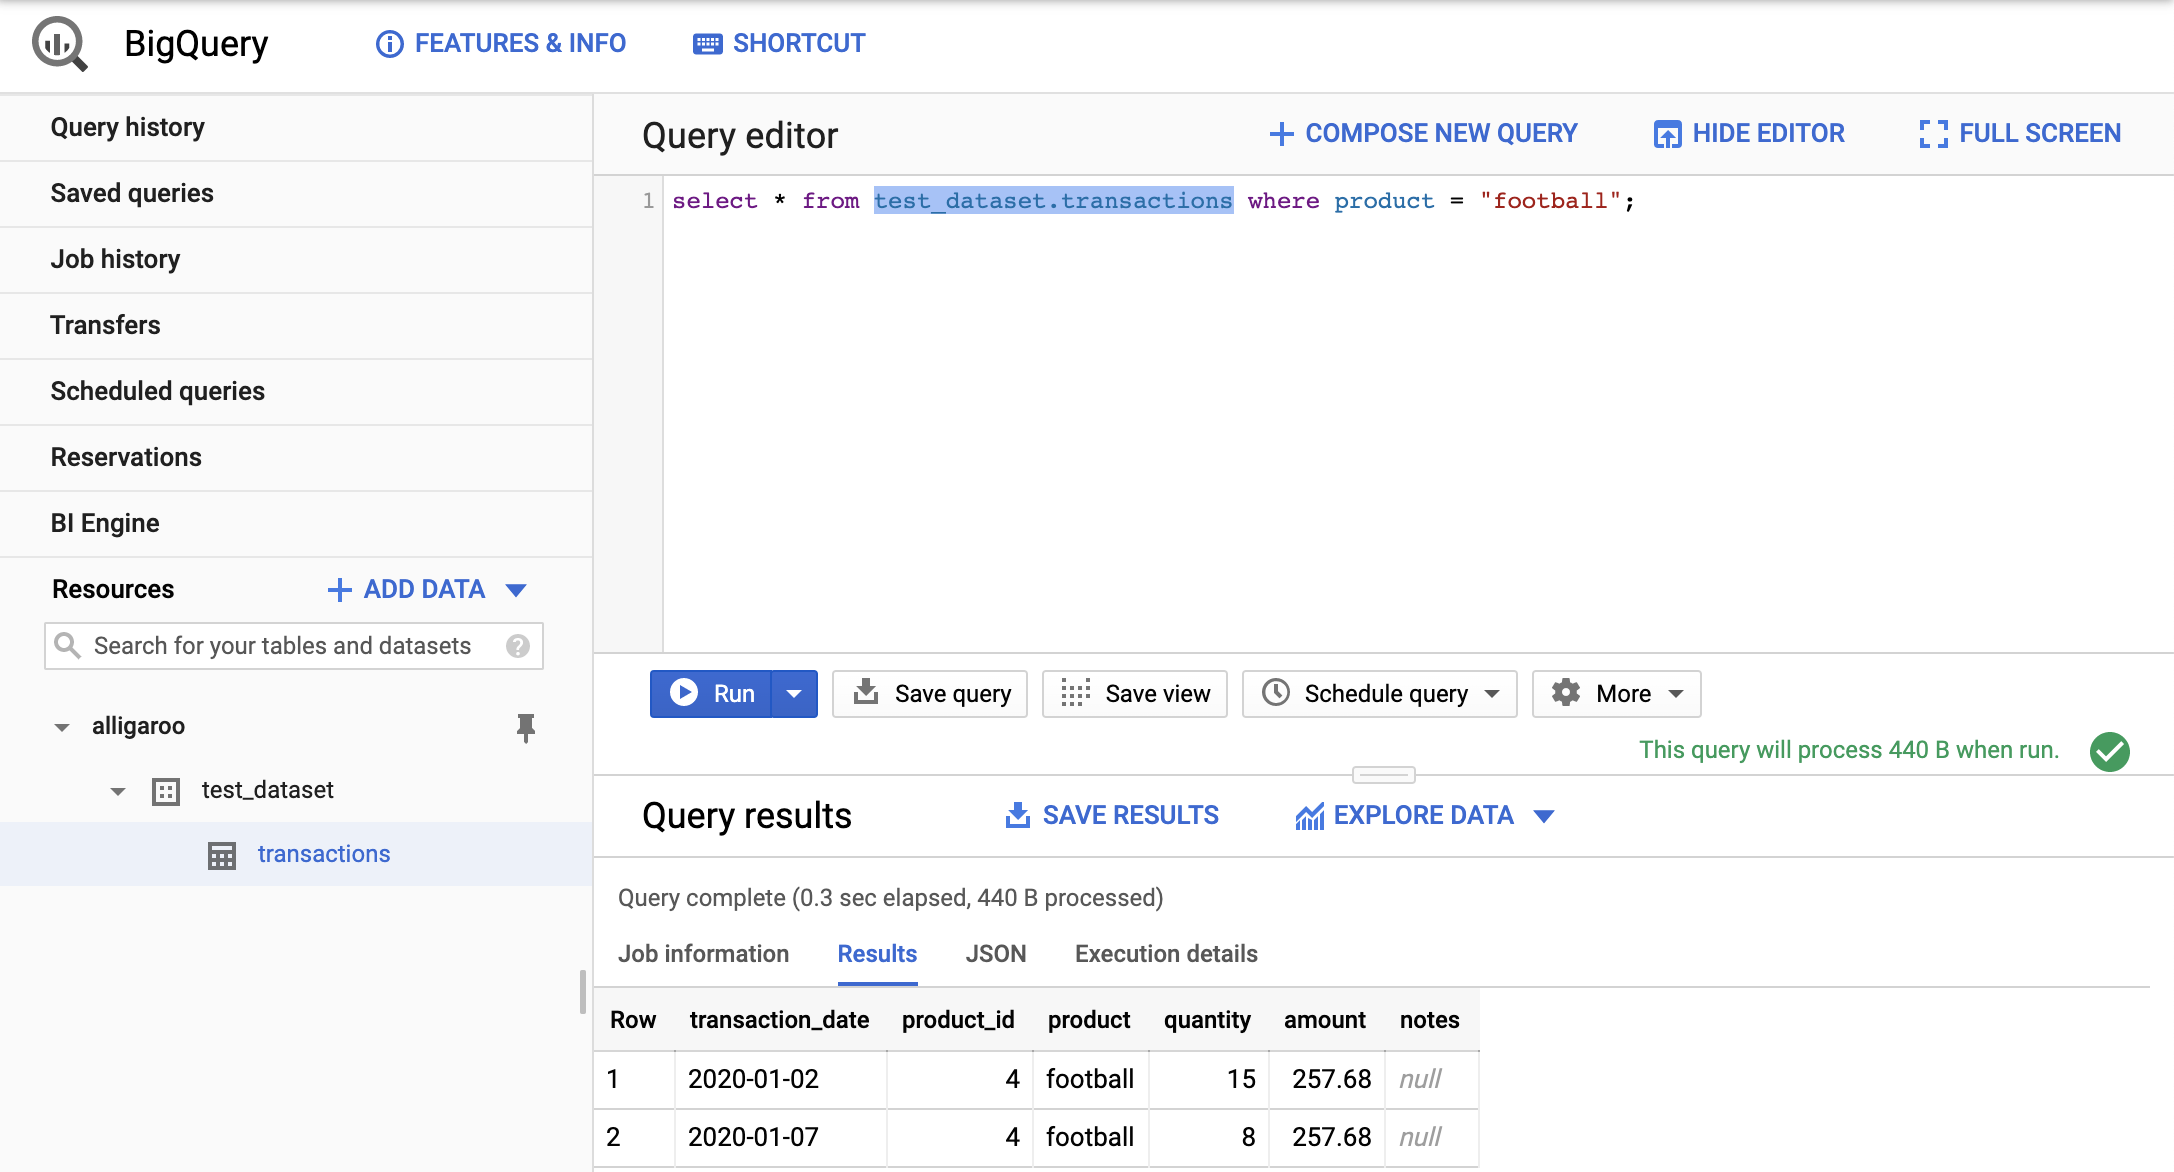
A couple points..
- We need to qualify our table name using the dataset name. I.e. we need to put
test_dataset.transactions - The query processed 440 Bytes of data. Google charges you based on Bytes of data processed, so this is important to monitor.
6. Gotchas, Tips, And Best Practices
Going through this process for the first time, I encountered lots of errors. Most of them were related to me having insufficient permissions. If you encounter any “Permission Denied” or “Insufficient Permission” errors, navigate to the IAM and Admin section of Google Cloud and then
- Ask a project owner to do the steps outlined in this article and see if he/she encounters the same errors or
- Ask a project owner to promote you to a project owner or
- Ask a project owner to give you admin access to Google Cloud Storage and BigQuery.
I also had errors transferring data because my GCS bucket was not in the same region as my BigQuery dataset, so make sure you get that right.
Another thing worth learning is table partitions. Most people (myself included) have data with a time dimension. For example, transactions data usually have a field like transaction_time or transaction_date. When you set up a BigQuery table, you can choose to partition the data on a field like this, and then somehow Google uses this information to optimize its queries and data storage. Google also allows you to require a partition filter when querying your data, so every query against your data must have some form of ... where transaction_date < yyyy-mm-dd. This helps prevent unnecessary full table scans which can be costly.
7. BigQuery For R And Python Users
Coming soon…
 GormAnalysis